如果你对电脑技术不太熟悉,但需要使用一些 AI 相关的软件(比如视频翻译、人声克隆、文生图等),那么你可能需要在电脑上安装 Python。Python 是一种编程语言,很多 AI 软件都依赖它运行。本文将手把手教你在 Windows 10 上安装 Python 3.10.4,并配置一个简单的环境来运行这些软件。
为什么选择 Python 3.10.4?
因为它是一个比较稳定的版本:
• 低于 3.10 的版本可能已经被一些软件放弃支持。 • 而更高版本(比如 3.11 或 3.13)可能太新,模型模块不兼容。
第一步:下载 Python 3.10.4
- 打开浏览器,使用你常用的浏览器,在地址栏输入以下网址,然后按回车,打开下载页面:
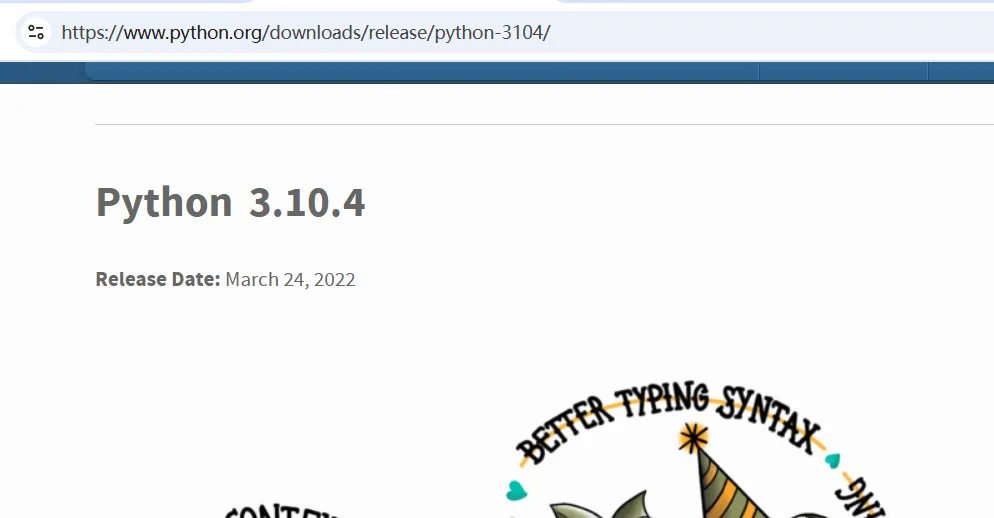
https://www.python.org/downloads/release/python-3104/
找到下载链接页面往下拉,直到看到“Files”部分。找到“Windows installer (64-bit)”这一行,点击下载(下载后文件名是
python-3.10.4-amd64.exe)。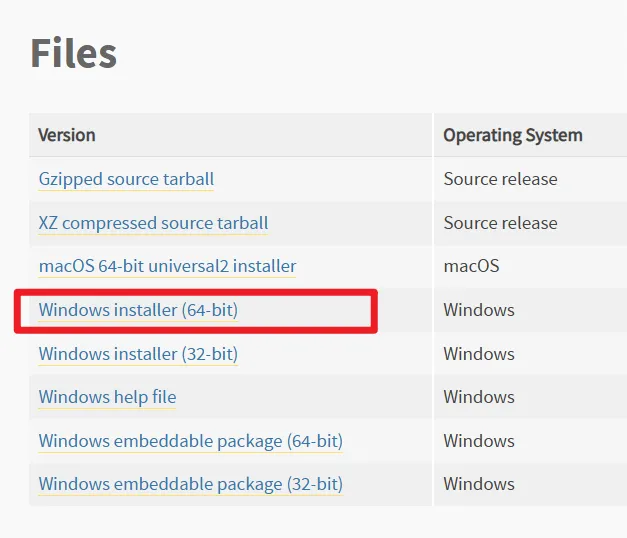
保存文件:下载会自动开始,文件会保存到你的“下载”文件夹(通常在
C:\Users\你的用户名\Downloads)。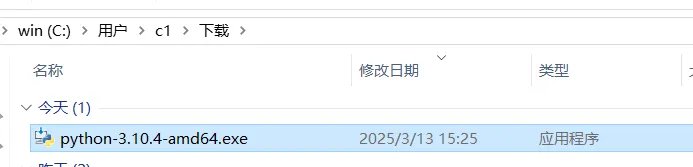
第二步:安装 Python 3.10.4
开始安装:找到刚下载的
python-3.10.4-amd64.exe文件,双击它。安装窗口会弹出。 • 重要:在窗口底部的选项中,勾选“Add Python 3.10 to PATH”,然后点击“Install Now”(立即安装)。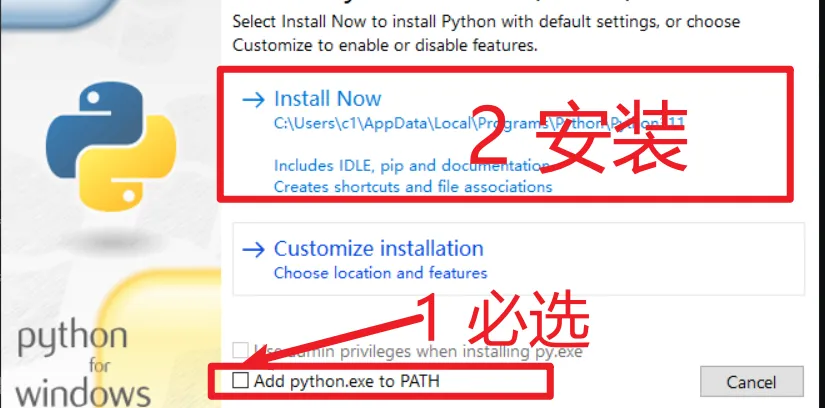
等待安装完成:安装过程大概需要几分钟。完成后,你会看到“Setup was successful”(安装成功)的提示。点击“Close”(关闭)退出安装程序。
第三步:检查 Python 是否安装成功
- 打开命令行终端(CMD):按住键盘上的 Windows 键 + R,弹出“运行”窗口。在输入框中输入
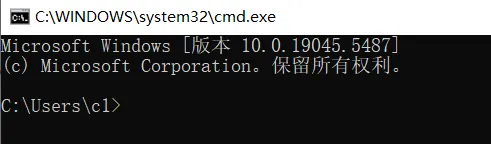
cmd,然后按回车。这会弹出一个黑色的命令行窗口。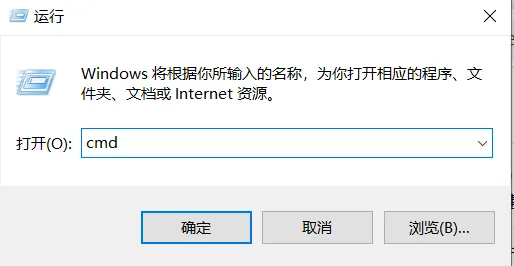
- 输入命令检查 Python:在命令行窗口中,输入以下内容,然后按回车:sh
python --version
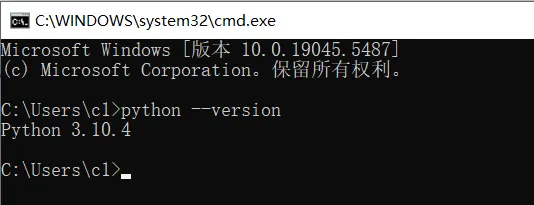
如果看到类似 Python 3.10.4 的输出,恭喜你,安装成功了!如果没有反应或者报错,可能是没勾选“Add Python 3.10 to PATH”,需要重新安装。
第四步:创建一个虚拟环境
虚拟环境就像一个独立的“小房间”,可以让不同的 AI 项目用不同的软件版本,避免冲突。我们用 Python 自带的 venv 模块来创建它。
- 选择一个文件夹:比如,你可以在 D 盘创建一个文件夹来存放你的项目。建议使用英文或数字组合的文件夹名,不要带有中文或空格及特殊符号,例如
D:/AIProject。 - 进入文件夹并打开命令行:进入
D:/AIProject,在文件夹地址栏输入cmd回车打开终端。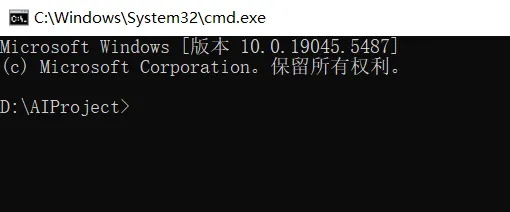

- 创建虚拟环境:在上一步打开的命令行中输入:sh
python -m venv myenv
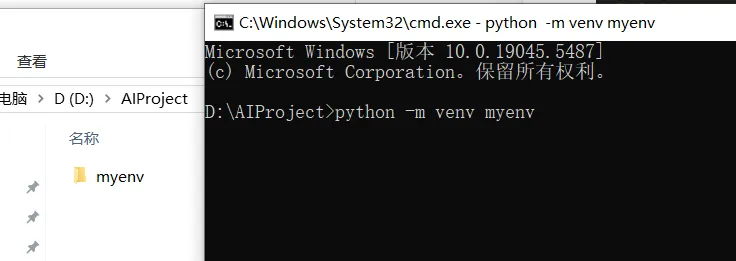
按回车后,文件夹里会多出一个名为 myenv 的子文件夹,这就是你的虚拟环境。 4. 激活虚拟环境:输入以下命令并按回车:
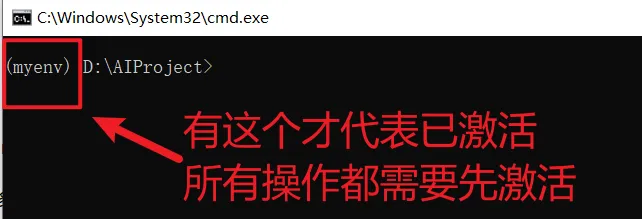
myenv\Scripts\activate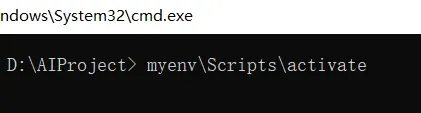
如果成功,你会看到命令行前面多了 (myenv),表示你进入了虚拟环境。
第五步:在虚拟环境中安装依赖
假设你有一个 AI 模型项目,里面有个 requirements.txt 文件(通常是软件作者提供的依赖列表)。我们来安装它。
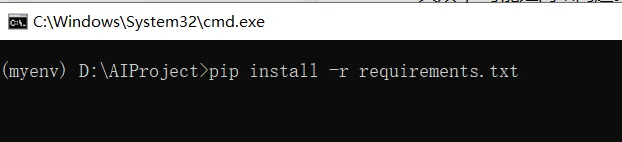
- 确保文件在正确位置:把
requirements.txt复制到你的“AIProject”文件夹里。 - 安装依赖:在激活虚拟环境的状态下(命令行有
(myenv)),输入:sh这会自动下载并安装文件里列出的所有软件包。pip install -r requirements.txt
- 解决常见问题: • 网络错误:如果提示“连接超时”或“下载失败”,可能是网络问题。可以尝试换个网络,或者多试几次。还可以加个国内镜像加速下载,输入:sh• 依赖冲突:如果提示某个包版本不兼容,试试更新 pip:
pip install -r requirements.txt -i https://pypi.tuna.tsinghua.edu.cn/simplesh然后重新运行安装命令。如果还是不行,可以联系软件作者,询问兼容的版本。pip install --upgrade pip
第六步:安装 PyTorch(支持 CUDA 12.4)
如果你有英伟达显卡并且已经安装了 CUDA 12.4 或高于 12.4 的版本(如果没有,可以跳过这部分,查看其他教程安装 CUDA),可以用以下步骤安装支持 GPU 的 PyTorch。
- 检查虚拟环境激活:确保命令行前面有
(myenv)。 - 安装 PyTorch:输入以下命令并按回车:sh如果你安装的 CUDA 版本大于 12.4,可以将上面命令中的
pip install torch torchvision torchaudio --index-url https://download.pytorch.org/whl/cu124cu124改为cu126,如果低于 12.1,可以改为cu118。torch是 PyTorch 主库,torchvision处理图像,torchaudio处理音频。--index-url指定了 CUDA 12.4 版本的下载地址。 - 验证安装:输入以下命令:sh
python -c "import torch;print(torch.__version__);print(torch.cuda.is_available())"

如果输出类似 2.6.0(版本号)和 True,说明安装成功且 GPU 可用。如果是 False,检查 CUDA 是否正确安装。如果是 No module named 'torch',说明上面命令安装 torch 失败。
注解:需要英伟达显卡和 CUDA 12.4 环境。如果没有,可以用 CPU 版,命令是:
pip install torch torchvision torchaudio最后:运行你的 AI 软件
现在环境已经配置好了!如果你的 AI 软件有具体的运行说明(比如 python run.py),在虚拟环境中输入对应命令即可。