对于 AI 新手来说,从源码部署一个 AI 软件可能会有些困难。有了整合包,只需下载、解压、双击即可使用,大大降低了使用门槛。但有时可能找不到现成的整合包,或者整合包没有及时更新。这时,你可以尝试自己创建一个整合包,并分享给其他人使用。
由于 AI 项目的模型通常很大,再加上 GPU 支持,即使压缩成 7z 格式,文件大小也可能远远超过 5GB,不管是上传网盘和存储,都比较困难。因此,本人不再制作整合包,如果你感兴趣,可以根据本教程自行制作整合包,并分享给他人。
本教程以 F5-TTS 为例,在 Windows 10 上使用 Python 3.10 创建一个整合包。主要步骤如下:
- 下载 Python 3.10 embed 版本 (不是 exe 安装包,而是一个zip压缩包)。
- 安装 pip,并为项目设置依赖查找路径。
- 下载 F5-TTS 源码。
- 安装 F5-TTS 的依赖模块。
- 创建一键启动脚本,并将模型目录设置到项目目录下。
- 配置代理,下载模型。
- 执行一次克隆任务,完成 Whisper等其他模型下载。
- 压缩为整合包。
- 为其他AI项目制作整合包
开始前的准备:
首先,创建一个空文件夹。为避免出错,建议在非系统盘下创建一个英文文件夹,例如 D:\f5win。 本文以D:\f5win为例,然后,在该文件夹内再创建一个空文件夹 runtime,用于存放稍后下载的 Python 3.10 embed 版本文件。
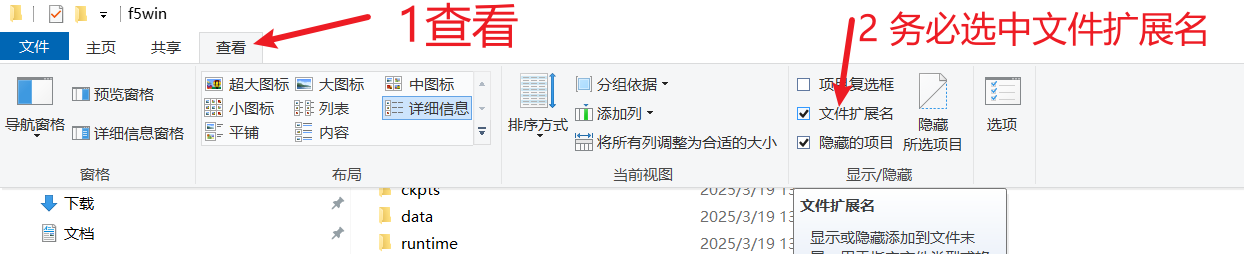
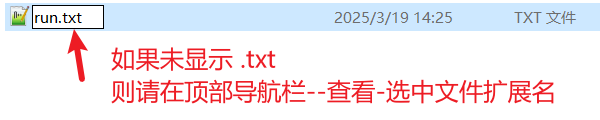
在开始之前,请务必点击文件夹导航栏的 “查看”,然后勾选 “文件扩展名”,否则后续操作容易出错,尤其是不熟悉扩展名的朋友。
1. 下载 Python 3.10 embed 版本
重要提示: 这里下载的是 embed 版本,而不是 exe 安装版。这个版本不依赖于你本机的 Python 环境,即使你本机已经安装了 Python,也仍然需要下载这个版本。
下载地址: https://www.python.org/downloads/release/python-31011/
打开网页后,拉到底部,点击
Windows embeddable package (64-bit)下载。下载后得到一个 zip 压缩包。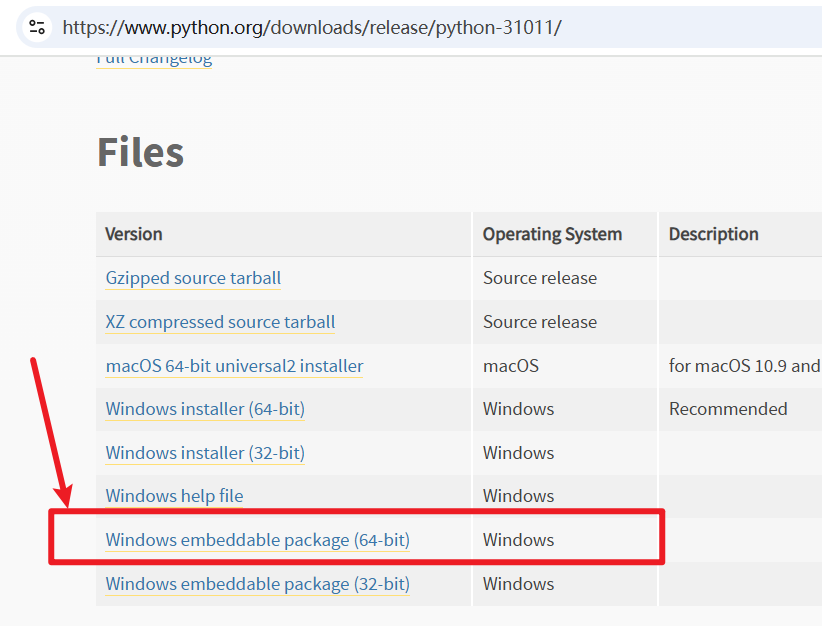
务必下载这个版本,不要弄错了!
下载完成后,将 zip 压缩包解压,将里面的所有文件复制到刚才创建的
runtime文件夹内。如下图所示: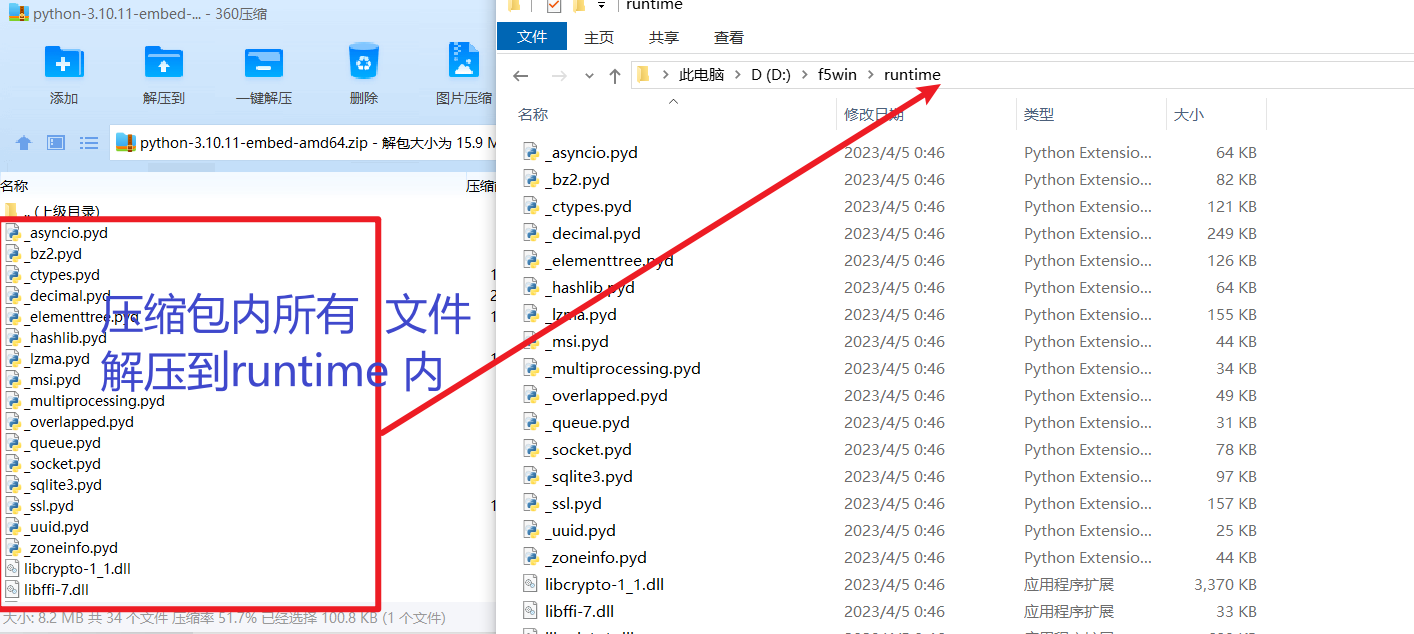
2. 安装 pip 并修改包查找路径
embed 版本的 Python 不包含 pip 模块,因此需要手动安装。
安装 pip:
右键另存为,将文件保存到
runtime目录下。保存后,runtime文件夹内应该有一个名为get-pip.py的文件。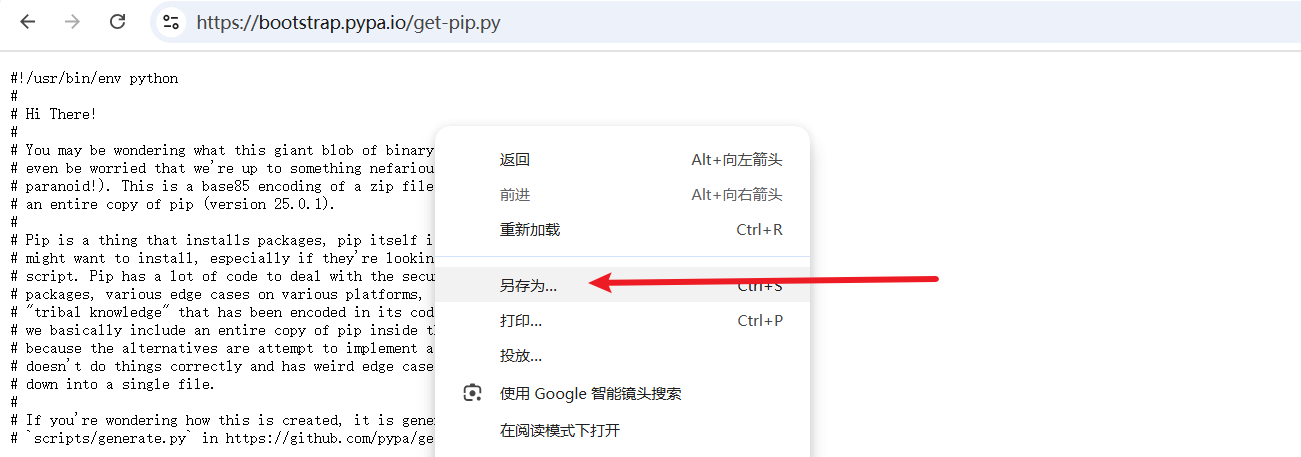

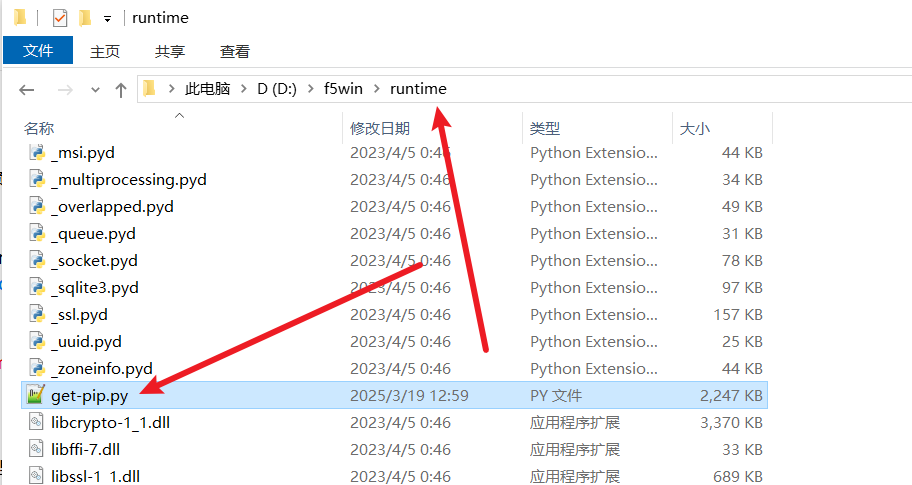
在
runtime文件夹的地址栏中输入cmd并回车,打开终端窗口(黑色窗口)。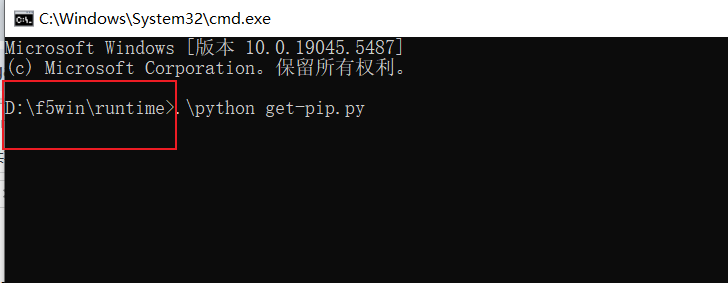
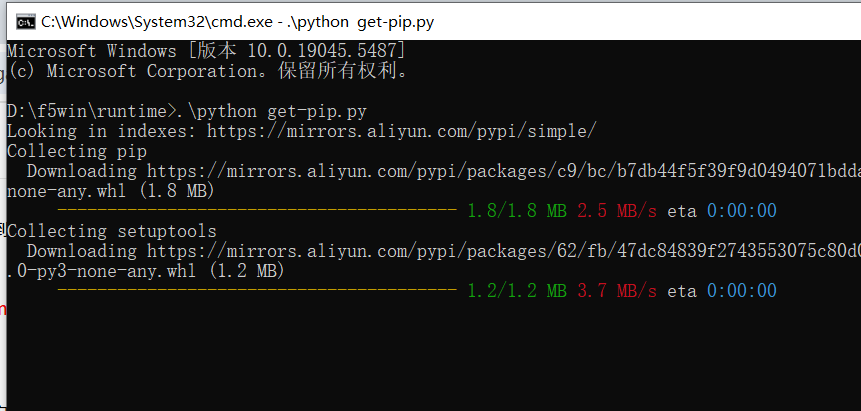
在终端窗口中输入命令
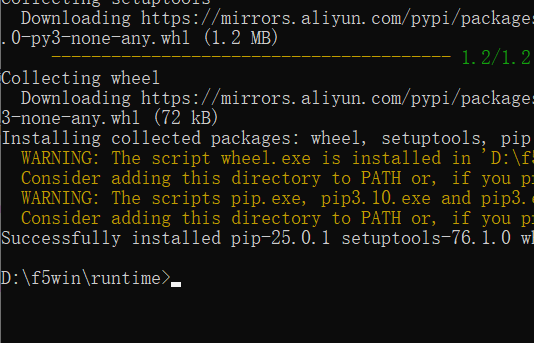
.\python get-pip.py并回车。务必注意 命令行显示的当前文件夹地址是否在runtime文件夹内,否则会出错。等待安装完成...
pip 模块安装成功!
修改
python310._pth文件:在
runtime文件夹内找到名为python310._pth的文件,右键使用记事本打开。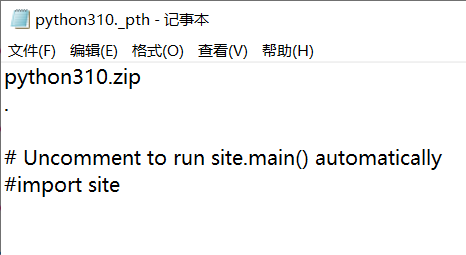
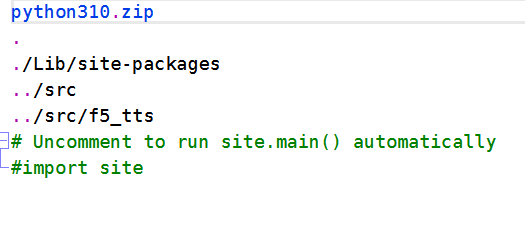
在第二行的点符号
.的下一行,添加以下三行内容:./Lib/site-packages ../src ../src/f5_tts保存文件。修改后的文件内容如下,请仔细核对,确保正确:
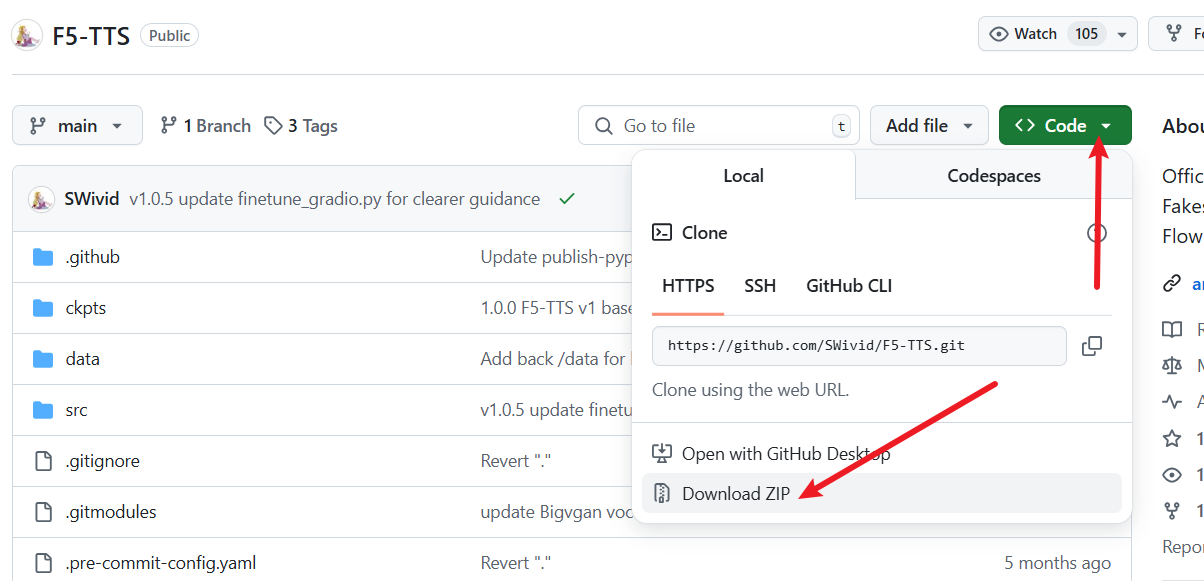
3. 下载 F5-TTS 源码
打开 F5-TTS 项目的 GitHub 仓库: https://github.com/SWivid/F5-TTS
下载源码的 zip 压缩包。
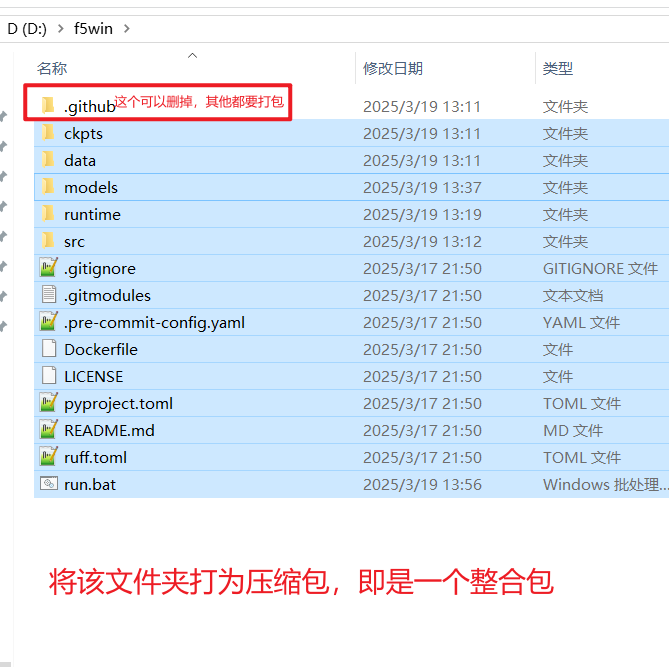
解压下载的 zip 包,将
F5-TTS-main文件夹内的 所有文件 复制到D:\f5win文件夹内。注意: 是复制里面的文件,而不是整个F5-TTS-main文件夹。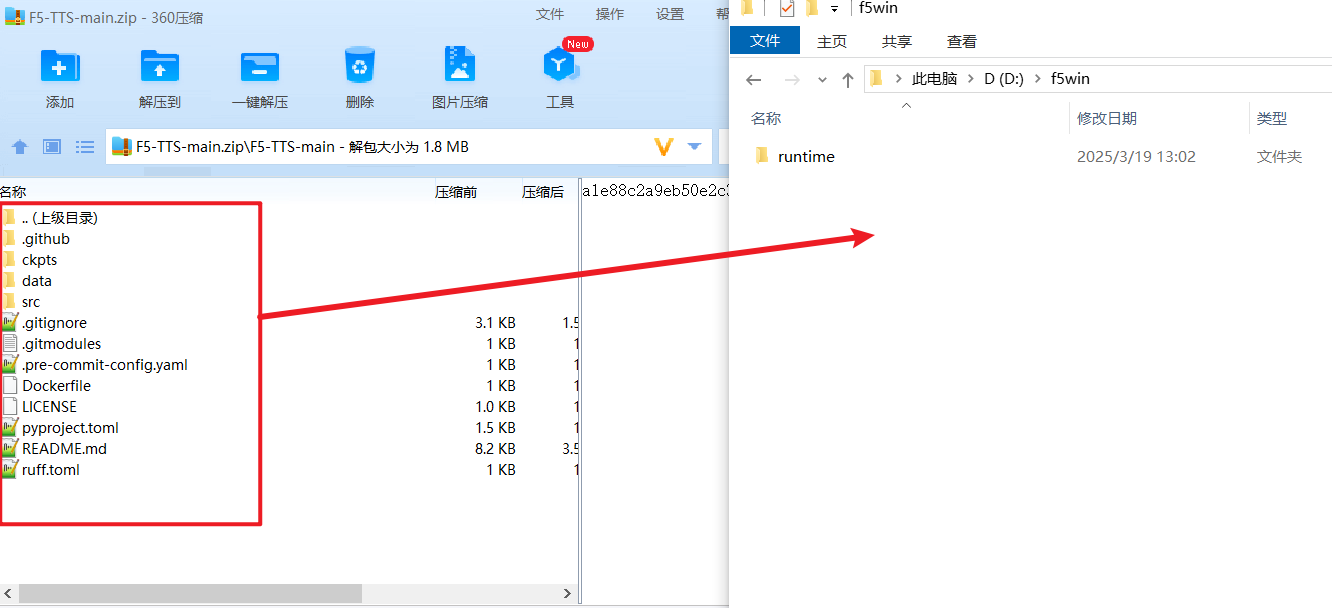
解压后,
D:\f5win文件夹的内容应该如下图所示: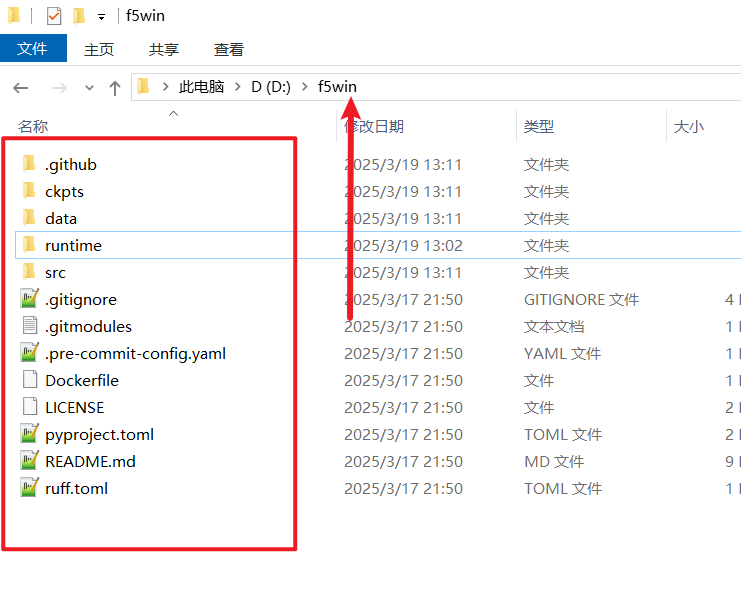
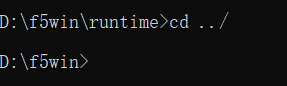
回到之前的CMD窗口
还是刚才的终端窗口,执行下
cd ../命令,确保命令行前的地址已减少了runtime字符,变成如下,接下来的操作都要在D:/f5win目录下执行
4. 安装依赖模块
回到 cmd 终端窗口,再次确认当前命令行显示的路径是
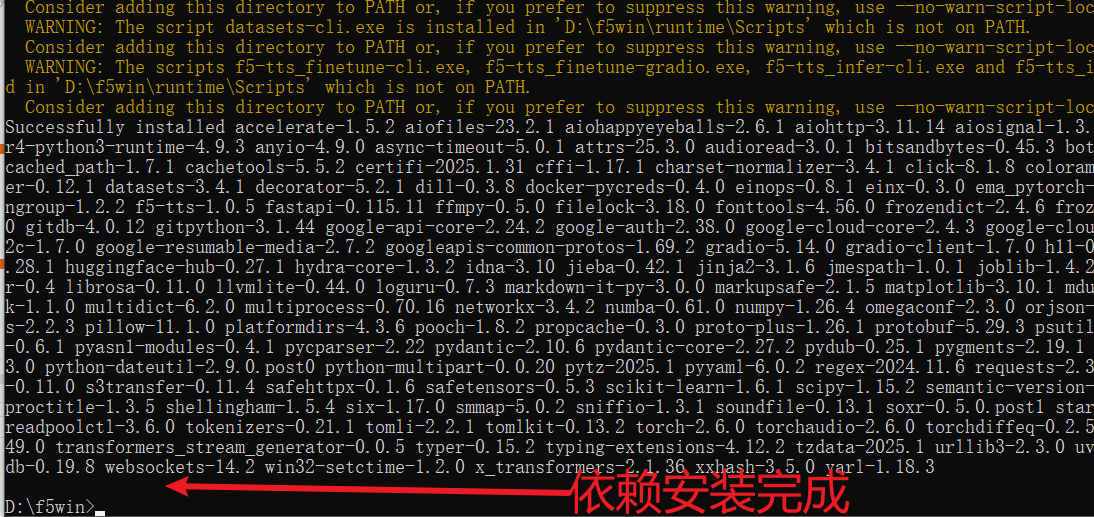
D:\f5win(不带runtime)。执行以下命令安装依赖(注意空格和点符号):
.\runtime\python -m pip install -e .
等待安装完成...
- 如果你希望整合包支持 NVIDIA 显卡 (可选): 继续执行以下命令安装 CUDA 版本的 PyTorch 和 torchaudio(注意空格和点符号,命令不可换行):
.\runtime\python -m pip install torch==2.4.0+cu124 torchaudio==2.4.0+cu124 --extra-index-url https://download.pytorch.org/whl/cu124
5. 创建一键启动脚本
默认情况下,模型会保存到 C 盘的用户目录下。为了方便整合,我们需要将模型下载到整合包内。
- 在
D:\f5win文件夹下右键--新建--文本文档,创建一个run.txt文件,用记事本打开,输入以下代码:
    @echo off

    chcp 65001 > nul

    set "HF_HOME=%~dp0models"
    set "MODELSCOPE_CACHE=%~dp0models"

    echo HF_HOME: %HF_HOME%
    echo MODELSCOPE_CACHE: %MODELSCOPE_CACHE%

    "%~dp0runtime\python" -m f5_tts.infer.infer_gradio  --inbrowser

pause上面脚本意思是:将模型保存到当前目录的
models文件夹内,然后启动web界面,并自动在浏览器中打开
保存文件后,将
run.txt重命名为run.bat。此时会弹出警告,选择“是”。如果没有弹出警告,说明你修改错误,请检查是否已显示文件扩展名。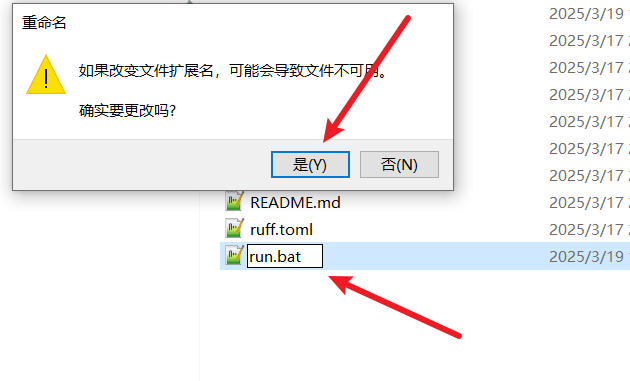
6. 配置科学上网环境
由于国内网络环境的限制,无法直接访问 F5-TTS 模型所在的 Hugging Face (huggingface.co)。因此,你需要配置科学上网环境,并设置为系统代理。
例如,假如工具是 v2ray,中可以这样设置:
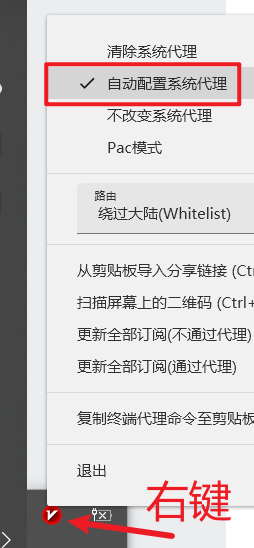
配置好后,双击刚才创建的 run.bat 文件。
如果双击后直接用记事本打开了文件,说明你修改扩展名失败,请回到本文顶部开始准备那里,按说明选中文件扩展名
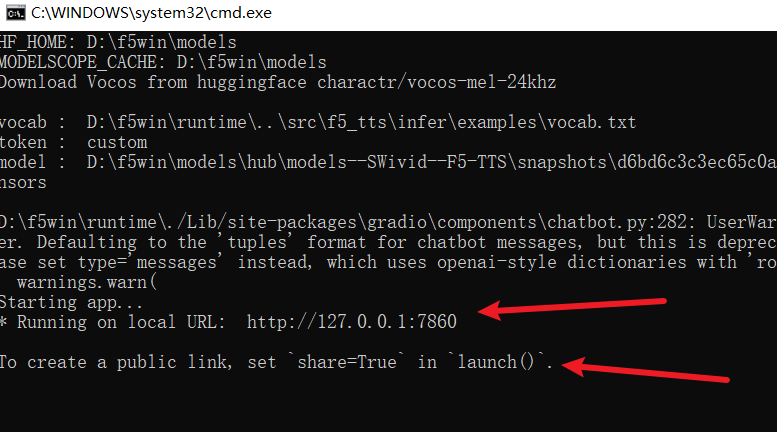
如果双击后打开了黑色窗口,则会开始下载模型到
D:\f5win\models文件夹内。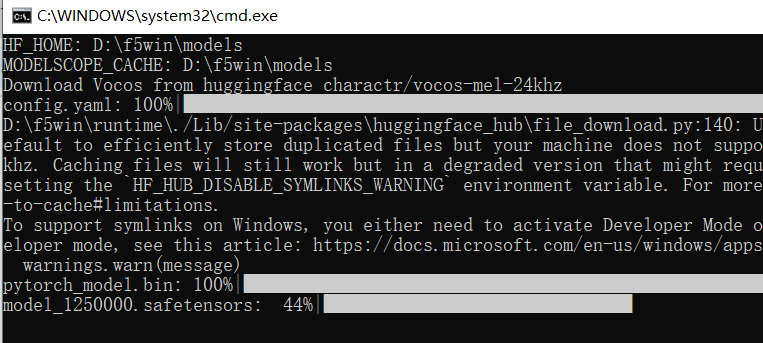
如果出现类似下图的报错,说明你没有配置好科学上网环境,或者没有正确设置为系统代理,导致无法连接到 Hugging Face 下载模型。
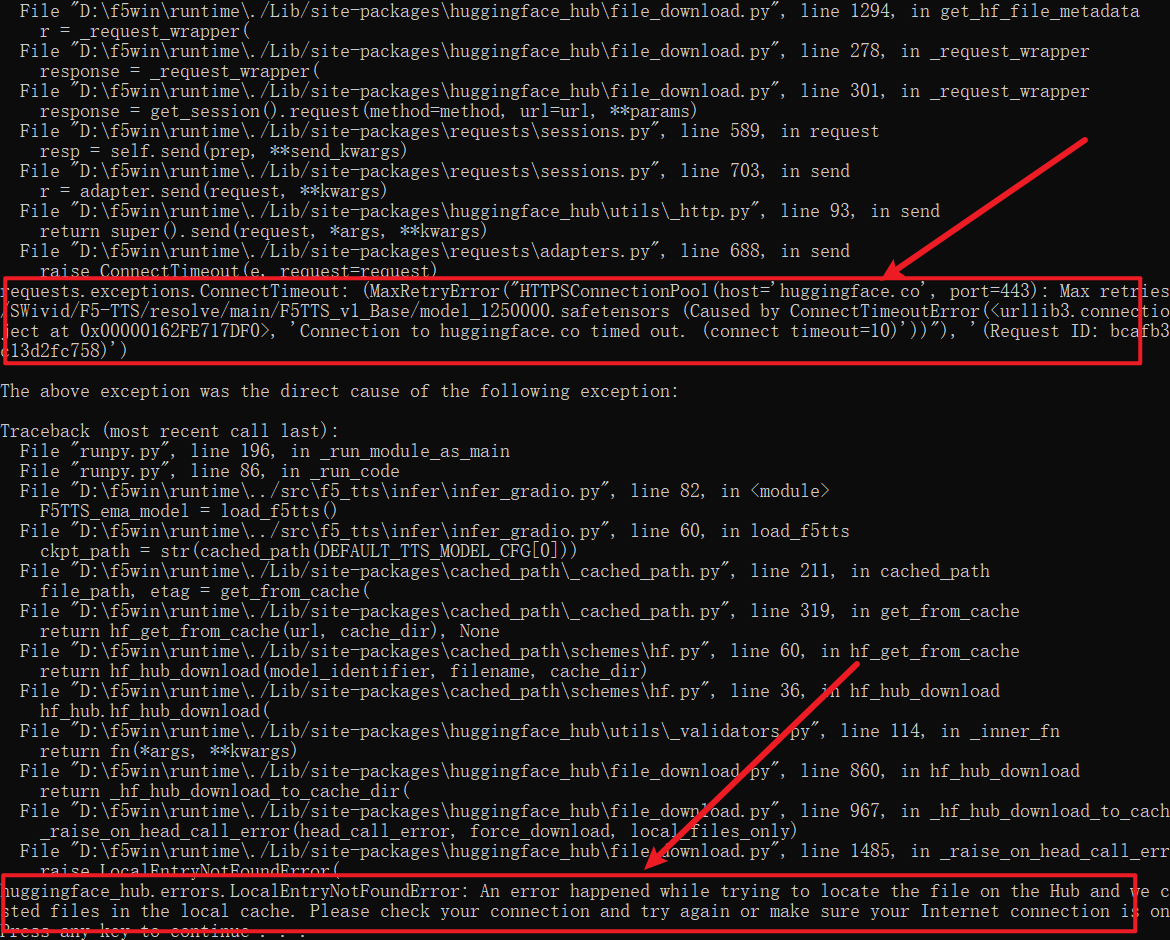
有时会出现下载到一半失败了,最大原因是你梯子节点不稳,请更换更稳定的梯子或节点
模型下载完成后,会自动打开浏览器窗口。
7. 执行一次克隆任务,下载 Whisper 模型
在进行语音克隆时,如果没有提供参考音频对应的文本,F5-TTS 会自动从 Hugging Face 下载 Whisper 模型。为了打包完整,我们需要提前下载它。
在自动打开的 Web 窗口中,选择一个 5-10 秒的干净参考音频,输入你想合成的文字(例如“你好啊朋友”),然后点击“合成”。
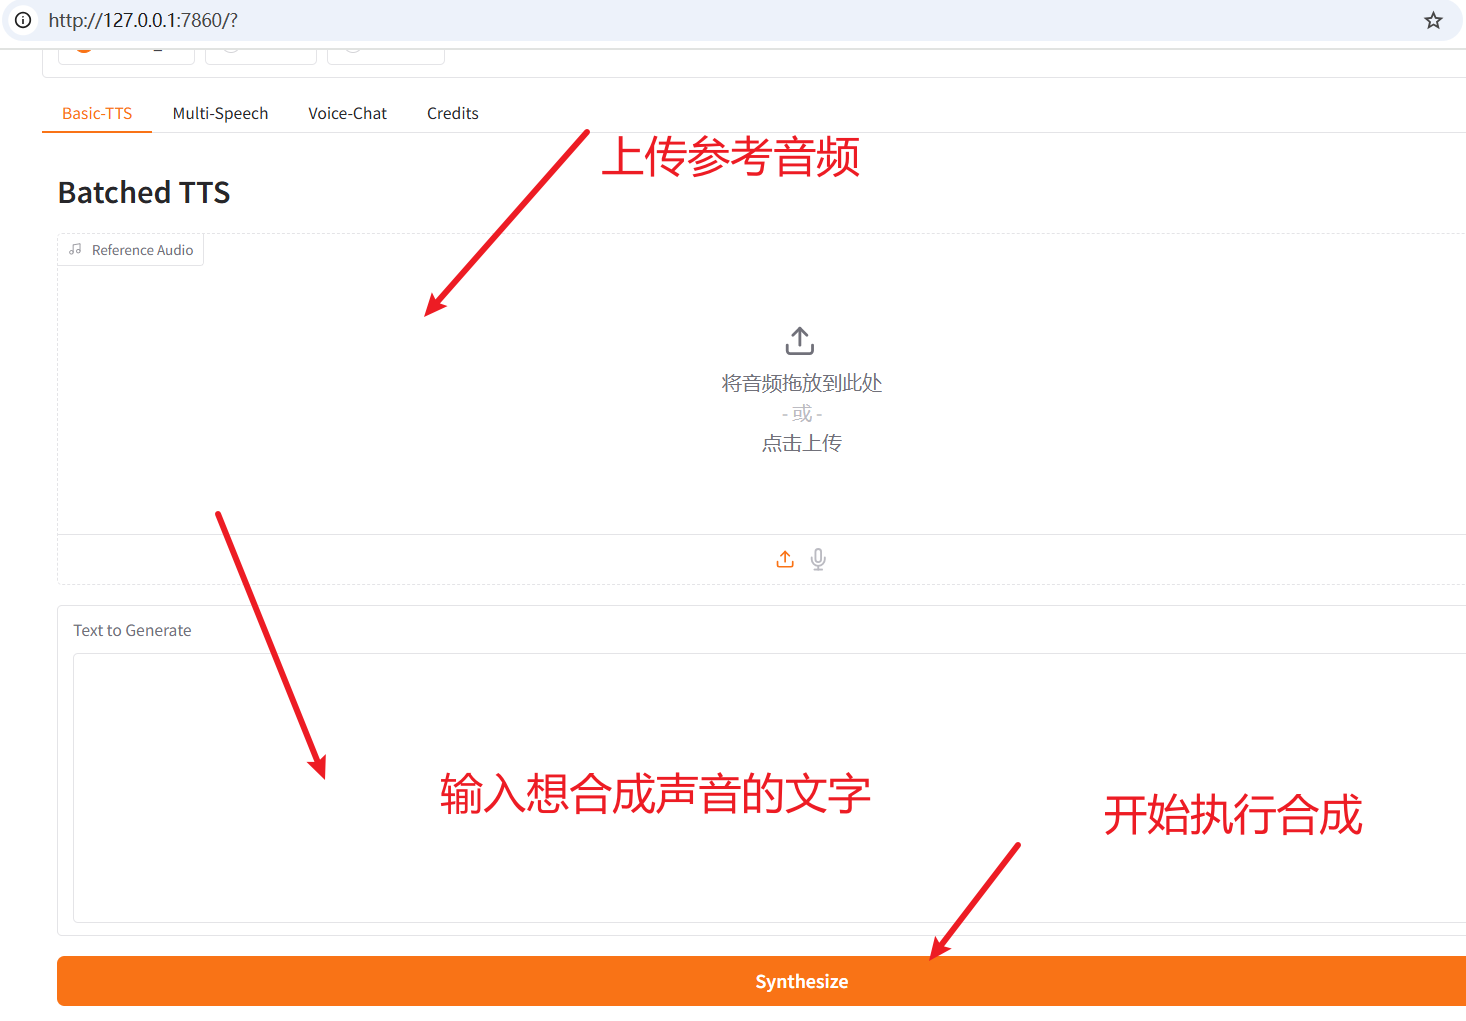
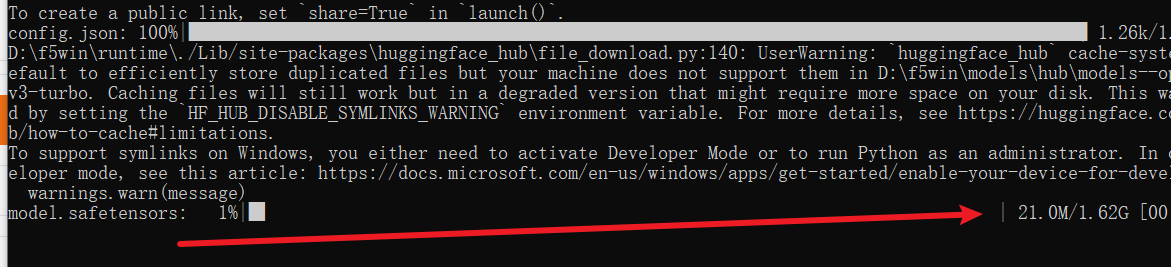
这将开始下载 Whisper 模型。
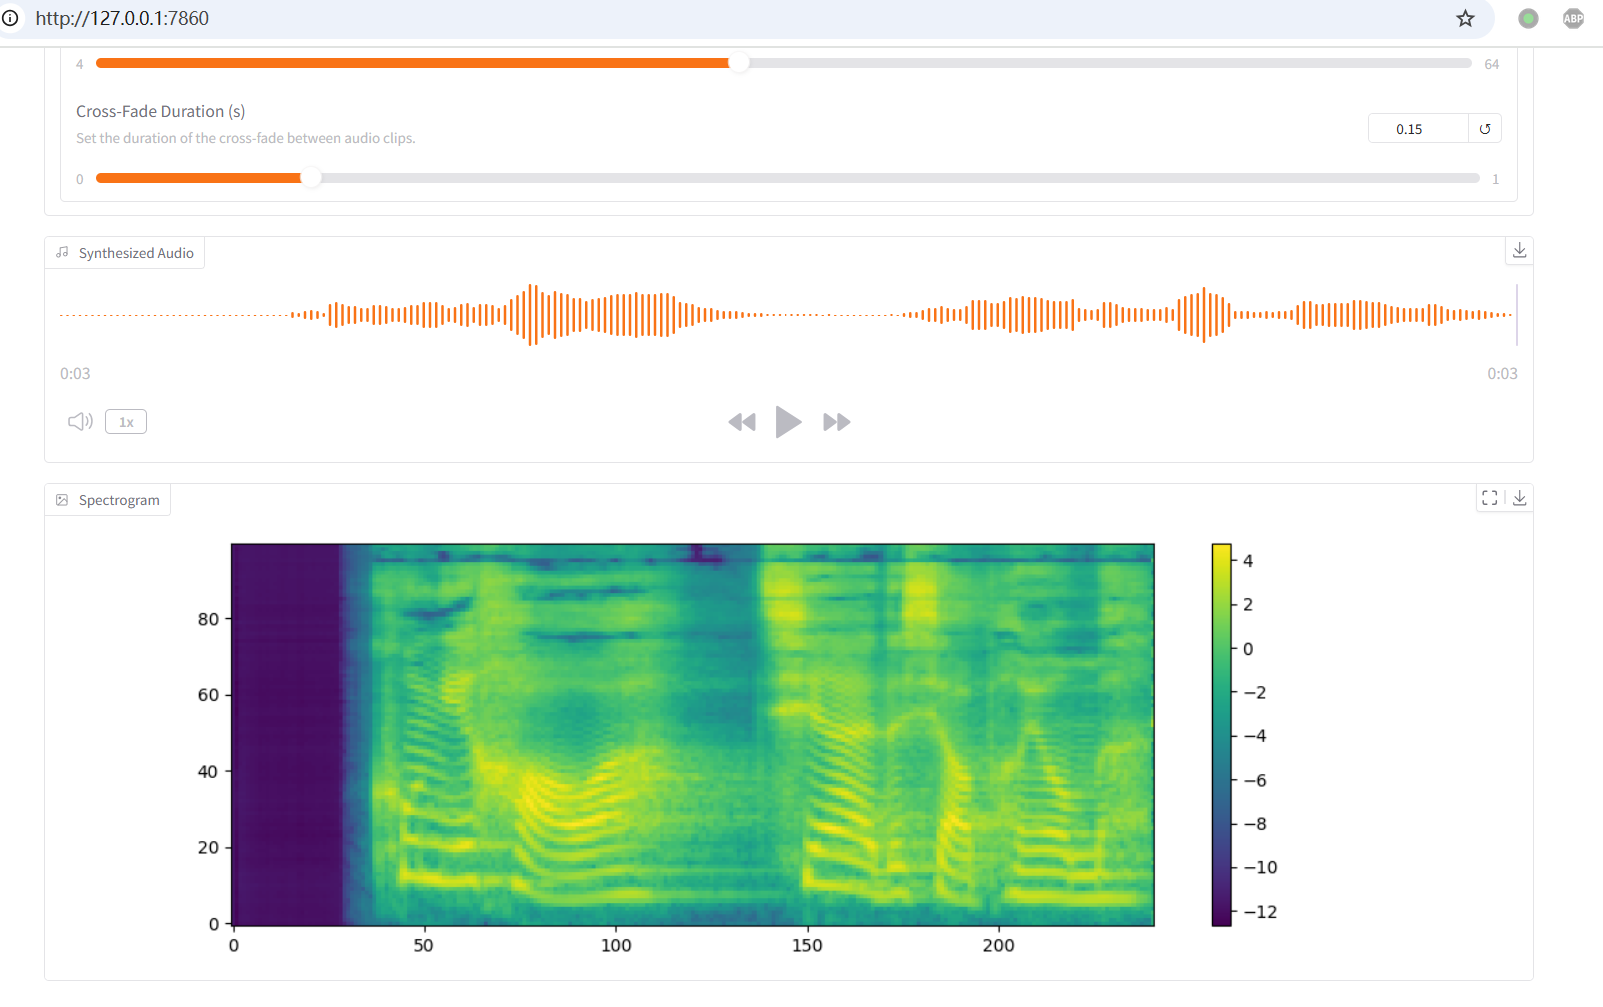
当合成成功且没有出错时,就可以开始将项目打包为整合包了。
8. 压缩为整合包
- 在压缩之前,你可以将
run.bat重命名为点我启动.bat,方便新手用户理解。 - 将整个
D:\f5win文件夹压缩为 zip 文件,或者压缩为体积更小的 7z 文件。 - 将压缩包分享给其他人,他们解压后双击
run.bat(或点我启动.bat) 即可使用。
9. 如何为其他 AI 项目制作整合包
GitHub 上大部分基于 Python 的开源项目都可以使用类似的方法制作整合包。主要区别在于以下三点:
Python 版本: Python 3.10 是最通用的版本,适用于大多数项目。如果项目有特殊要求(比如 3.11 或 3.12),可以在此页面 https://www.python.org/downloads/windows/ 寻找对应版本的
Windows embeddable package (64-bit)。务必注意,不可下载 exe 安装包。python310._pth文件的内容:./Lib/site-packages仍然是必须添加的。- 其他的路径根据项目的实际情况添加。
- 如果项目里有一个名为
cfg的代码目录,则添加一行../cfg。 - 如果项目有一个
src目录,src下还有其他文件夹,则继续添加../src/目录名。
run.bat脚本的启动命令:- 只需要修改这一行命令:
"%~dp0runtime\python" -m f5_tts.infer.infer_gradio --inbrowser "%~dp0runtime\python"部分保持不变,后面的部分改为对应项目启动的命令(不包含python)。- 如果有疑问,可以将
run.bat的内容和对应项目的启动命令交给 AI,让它仿照run.bat给出新的启动脚本。记得告诉 AI,使用run.bat里的 Python 解释器。
- 只需要修改这一行命令: