为什么要安装 Visual Studio Community?
你可能听说过 Visual Studio,它被誉为“宇宙第一 IDE”(集成开发环境),功能非常强大。但同时,它也确实比较“庞大”。对于不是专门做 .NET 开发的朋友来说,通常不需要安装它。
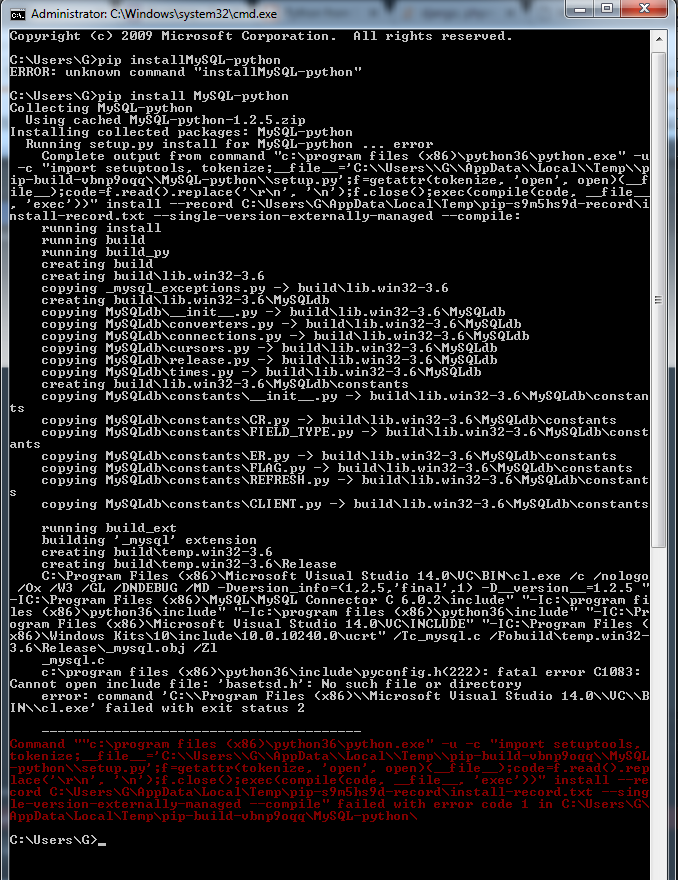
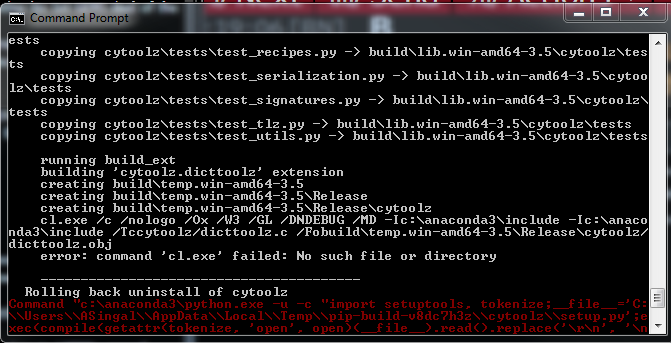
但是!如果你经常需要在自己的 Windows 电脑上尝试运行一些开源的 AI 项目(比如基于 Python 的项目),那么安装 Visual Studio Community 就变得几乎是必需的了。这是因为很多 Python 库(我们称之为“依赖”)在安装时,需要在你的电脑上进行“编译”这个步骤,而这个过程需要用到微软的 C++ 编译工具(简称 MSVC)。如果你的电脑上没有安装 MSVC 环境,安装这些 Python 库时就会失败,并显示类似下面这样的错误信息:
幸运的是,安装 MSVC 编译环境最简单、最推荐的方法,就是安装免费的 Visual Studio Community 版本。下面我们就来看看如何操作。
第一步:下载 Visual Studio 安装器
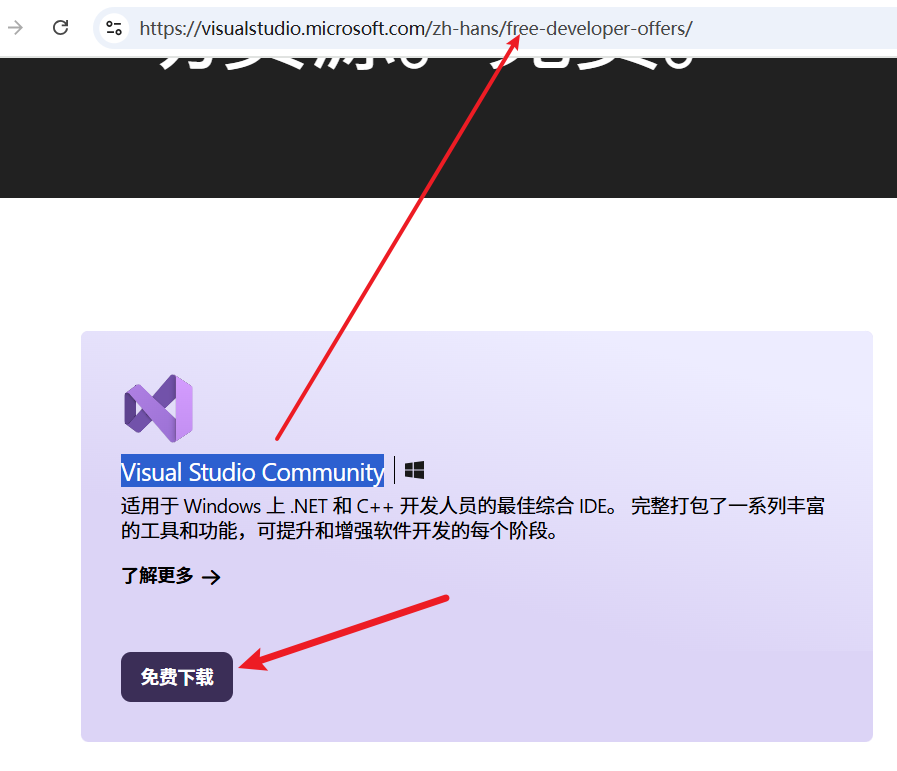
- 打开你的浏览器,访问这个地址:
https://visualstudio.microsoft.com/zh-hans/free-developer-offers/ - 在页面上找到
Visual Studio Community这个区域,点击它下方的“免费下载”按钮。
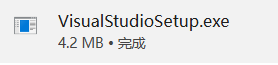
- 下载完成后,找到下载好的
.exe文件(通常以VisualStudioSetup或类似名字开头),双击运行它。
- 可能会弹出一个小的提示窗口,点击“继续”。安装程序会准备一会儿。
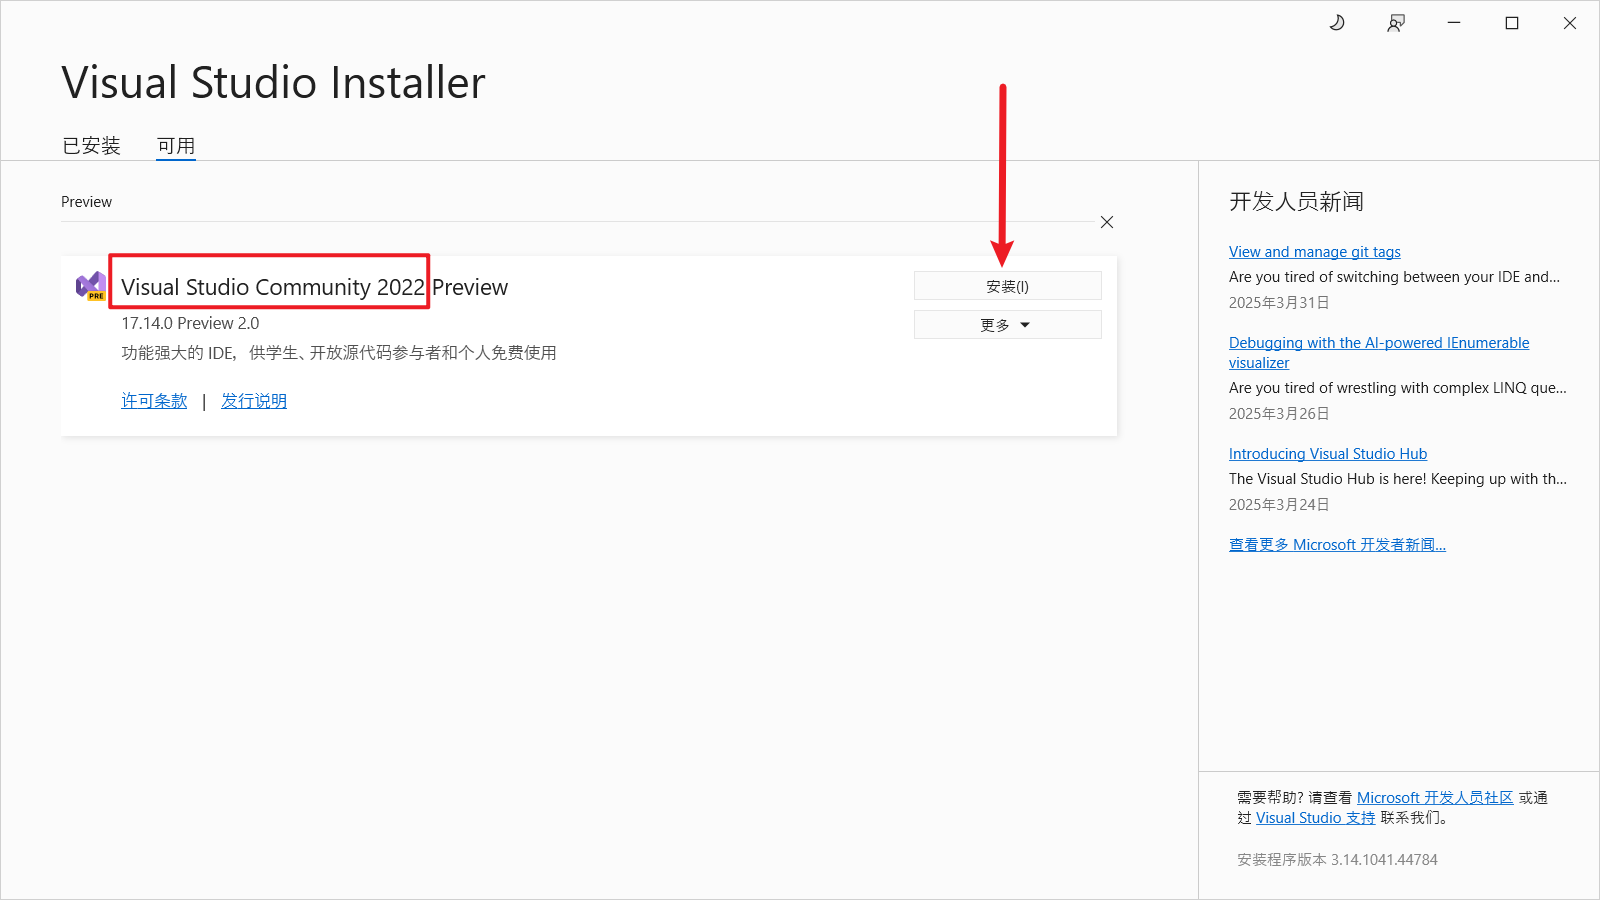
- 接下来,你会看到 Visual Studio Installer 的主界面。它会显示可供安装的不同 Visual Studio 版本。请确保你在“可用”标签页下,找到带有
Visual Studio Community字样的选项(比如Visual Studio Community 2022)。这个版本是完全免费的,其他版本(如 Professional 或 Enterprise)是需要付费的。选择最新的 Community 版本(比如 2022 或更新的版本),然后点击它对应的“安装”按钮。
第二步:选择需要安装的组件
点击“安装”后,会进入一个更详细的设置界面,让你选择需要安装的具体功能,这些功能被称为“工作负荷”。
- 在这个界面中,向下滚动,找到名为“桌面应用和移动应用”的大分类。
- 在这个分类下,找到并勾选“使用 C++ 的桌面开发”这一项。这是我们安装 MSVC 编译环境的关键。
- 勾选了“使用 C++ 的桌面开发”后,请看窗口的右侧,会有一个“安装详细信息”区域,里面列出了将要安装的具体组件。大部分必要的组件已经被自动勾选了。
- (重要建议) 在右侧的“安装详细信息”里,找到并额外勾选那些名字中带有 “生成工具” 和 “MSVC v14x ... 生成工具” 字样的选项(比如 v140 、v141、v142、v143 等)。如下图红框中的 4、5、6 区域所示(具体编号和版本可能略有不同,关键是看名字)。
同时,至少选中一个 Windos 10/11 SDK,根据你的系统版本选择10或11
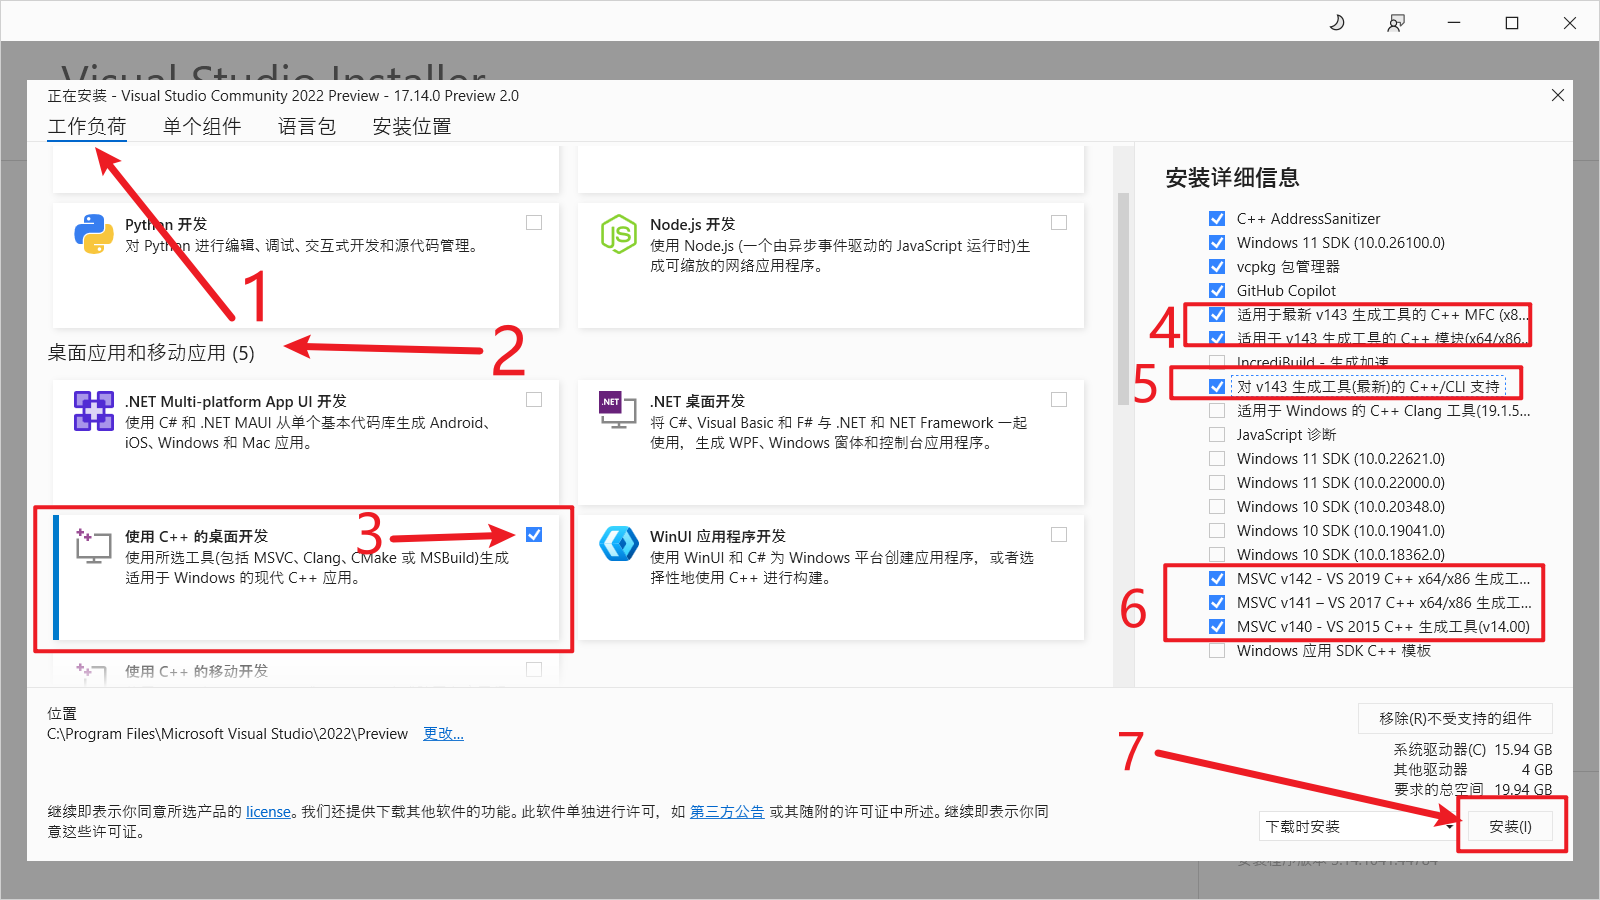
为什么要多选这几项? 因为有些老的 Python 项目可能依赖特定版本的 MSVC 编译器。为了避免以后遇到因缺少某个版本而导致的编译错误,建议在这里把几个主要的 MSVC 版本(v142, v143 等)的生成工具都选上。这样做只是会多占用一点硬盘空间,但能省去未来不少麻烦。
- 确认选择无误后,点击界面右下角的“安装”按钮。
第三步:等待安装完成
现在,安装程序会开始下载并安装你选择的所有组件。这个过程需要一些时间,具体时长取决于你的网络速度和电脑性能,请耐心等待。
安装成功完成后,安装器会提示你。这时你可以关闭 Visual Studio Installer 了。
好了,Visual Studio Community(以及最重要的 C++ 编译环境)就已经成功安装到你的电脑上了!现在,再回到之前因为缺少 MSVC 而报错的 pip install 命令,重新运行试试看,这次应该就能顺利通过了!