如果你想在电脑上运行一些需要 GPU 加速的程序(比如 AI 软件),可能需要安装 CUDA。
CUDA 是英伟达(NVIDIA)推出的一种工具,能让你的显卡帮你干更多活儿。本文将手把手教你在 Windows 10 上安装 CUDA 12.6,以及配套的 cuDNN 9.8。
为什么选 CUDA 12.6而不是12.8?因为 12.8 是最新版,可能有些软件还没适配好,容易出兼容问题。而 12.6 是一个相对稳定又不过时的版本。当然,如果你想要 12.4 或 12.8,安装方法也差不多,可以参考这篇教程调整版本号。
别担心,即使你完全不懂技术,按着步骤走也能搞定!让我们开始吧!
第一步:检查你的显卡是不是英伟达的
打开设备管理器
- 右键点击桌面左下角的“开始”按钮(那个 Windows 图标)。
- 在弹出的菜单里选“Windows管理工具-计算机管理”,会打开窗口。
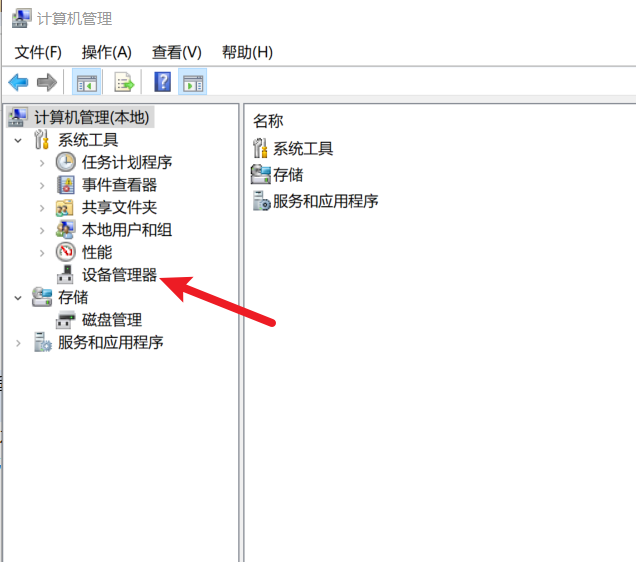
找到显卡信息
在计算机管理打开的窗口里左侧点击
设备管理器,右侧找到“显示适配器”(Display adapters),点一下前面的小箭头展开。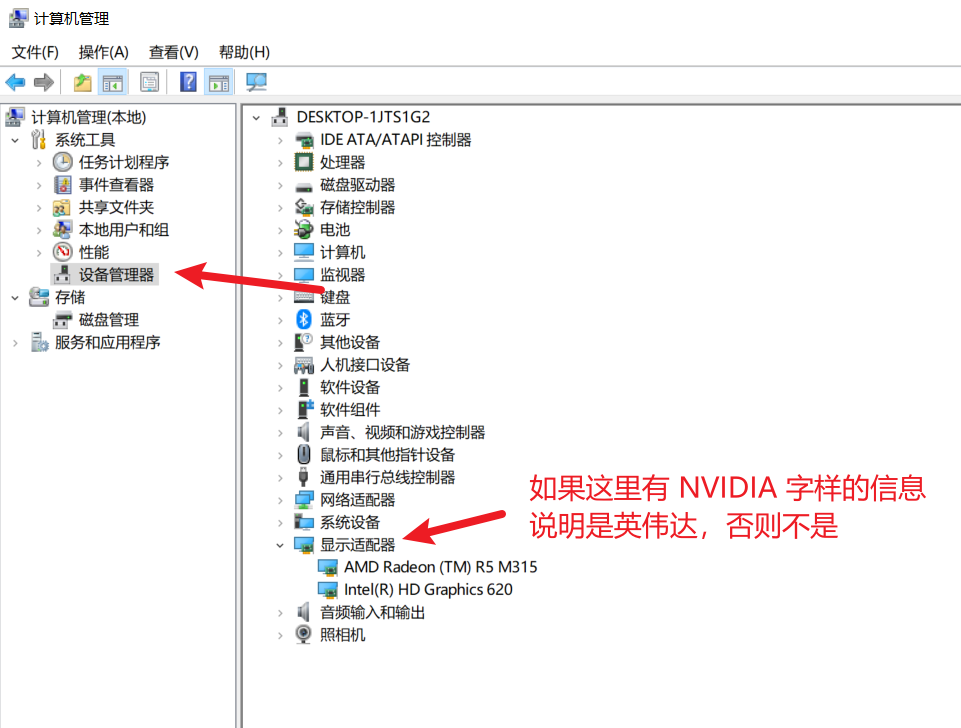
看看里面有没有“NVIDIA”字样,比如“NVIDIA GeForce GTX 1660”之类。
如果有,恭喜,你的显卡是英伟达的,可以继续往下走。如果没有(比如显示“Intel”或“AMD”),那 CUDA 用不了,教程到此为止。
第二步:检查显卡驱动版本并升级
打开英伟达管理软件
如果你装过显卡驱动,桌面右下角的任务栏(时间旁边)可能有个绿色“NVIDIA”图标。右键它,选择“NVIDIA GeForce Experience”打开。
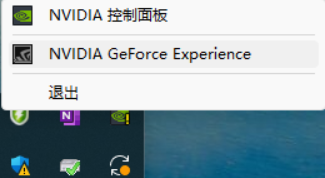
如果没有,跳到第 3 步手动下载。
检查驱动版本并升级
- 打开后,点击左上角的“驱动程序”(Drivers)。
- 它会显示当前驱动版本(比如“546.33”),如果有新版本,会有“下载”按钮。
- 点击“下载”,然后按提示安装,安装完重启电脑。
没有软件?手动下载驱动
- 打开浏览器,输入网址:https://www.nvidia.com/en-us/geforce/drivers/ 下载驱动升级软件,然后安装
- 安装后打开,按说明检查更新驱动。
第三步:检查是否已有 CUDA 并确定最大支持版本
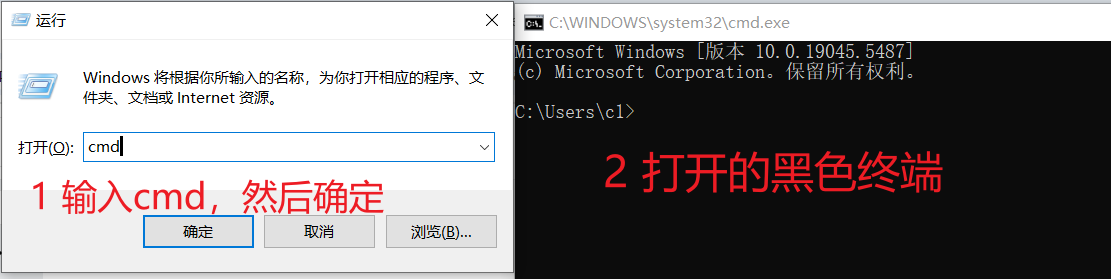
- 打开命令行终端(CMD)
- 按住键盘上的 Windows 键 + R,弹出“运行”窗口。
- 输入
cmd,按回车,打开一个黑色命令行窗口。
- 检查 CUDA 版本
- 在命令行里输入:
nvcc -V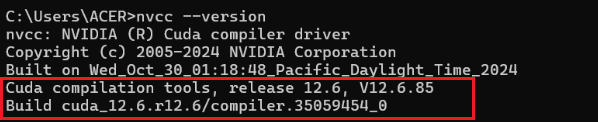
- 在命令行里输入:
按回车。如果显示类似 Cuda compilation tools, release 12.6, V12.6.xxx,说明已经装了 CUDA,版本是 12.6。如果显示“不是内部或外部命令”,说明没装过,往下走安装。
- 查看支持的最大 CUDA 版本
- 在命令行输入:
nvidia-smi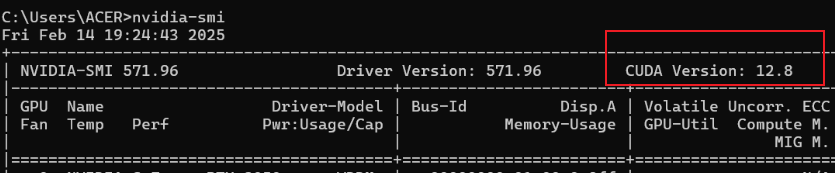
- 在命令行输入:
按回车,会显示一个表格,右上角有“CUDA Version”(比如 12.6 或更高)。这表示你的驱动支持的最高版本。只要是 12.6 或以上,就可以装我们想要的 CUDA 12.6。
第四步:下载并安装 CUDA 12.6
- 下载 CUDA 12.6
- 打开浏览器,进入英伟达官网下载页面:https://developer.nvidia.com/cuda-downloads?target_os=Windows&target_arch=x86_64&target_version=10&target_type=exe_local
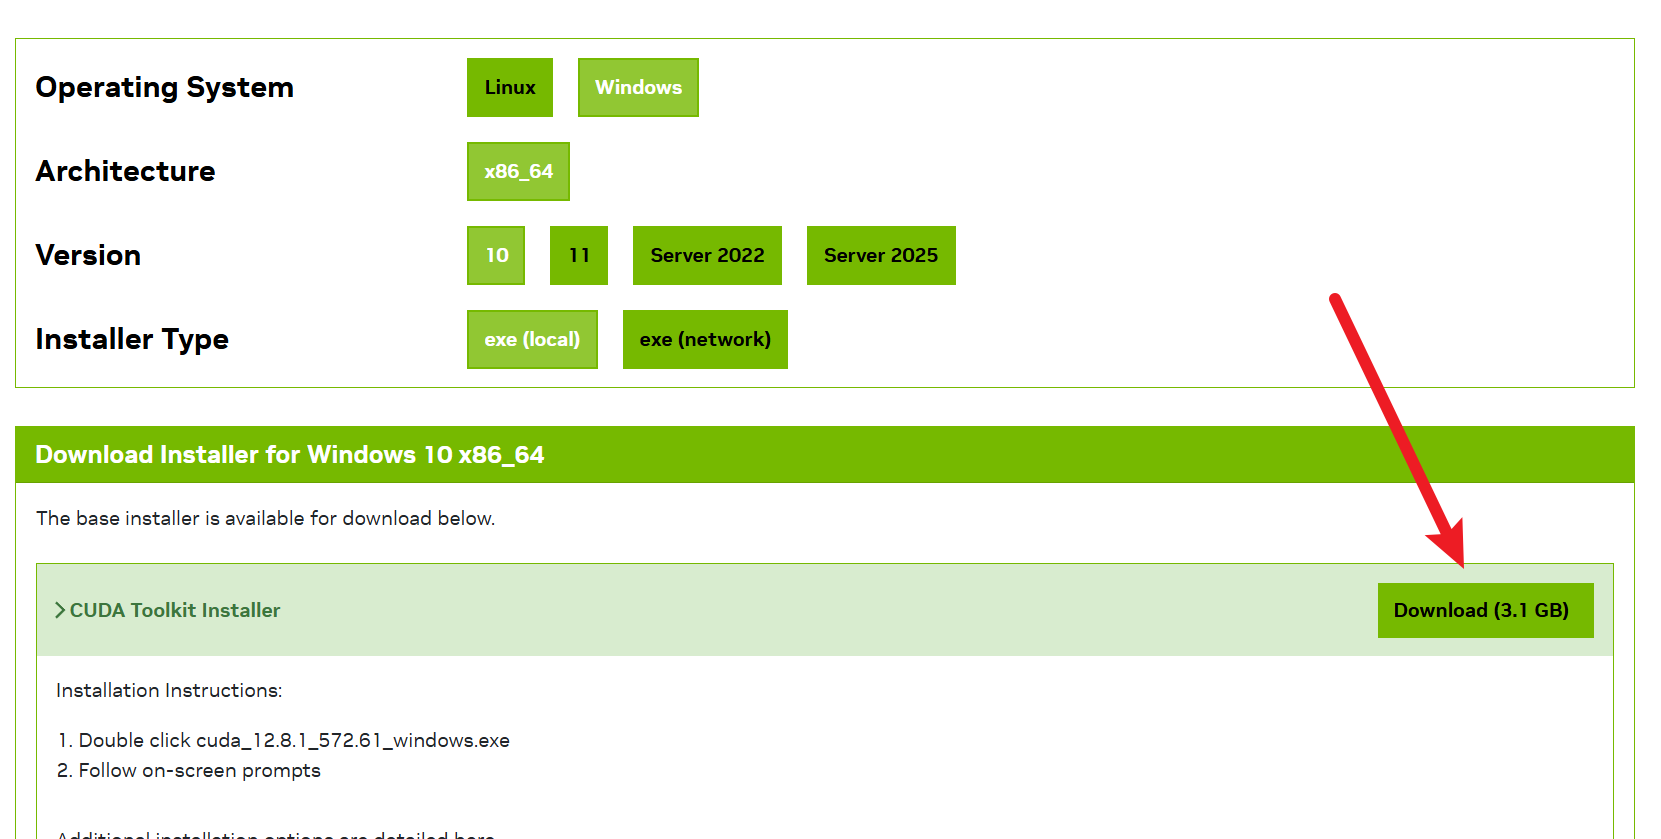
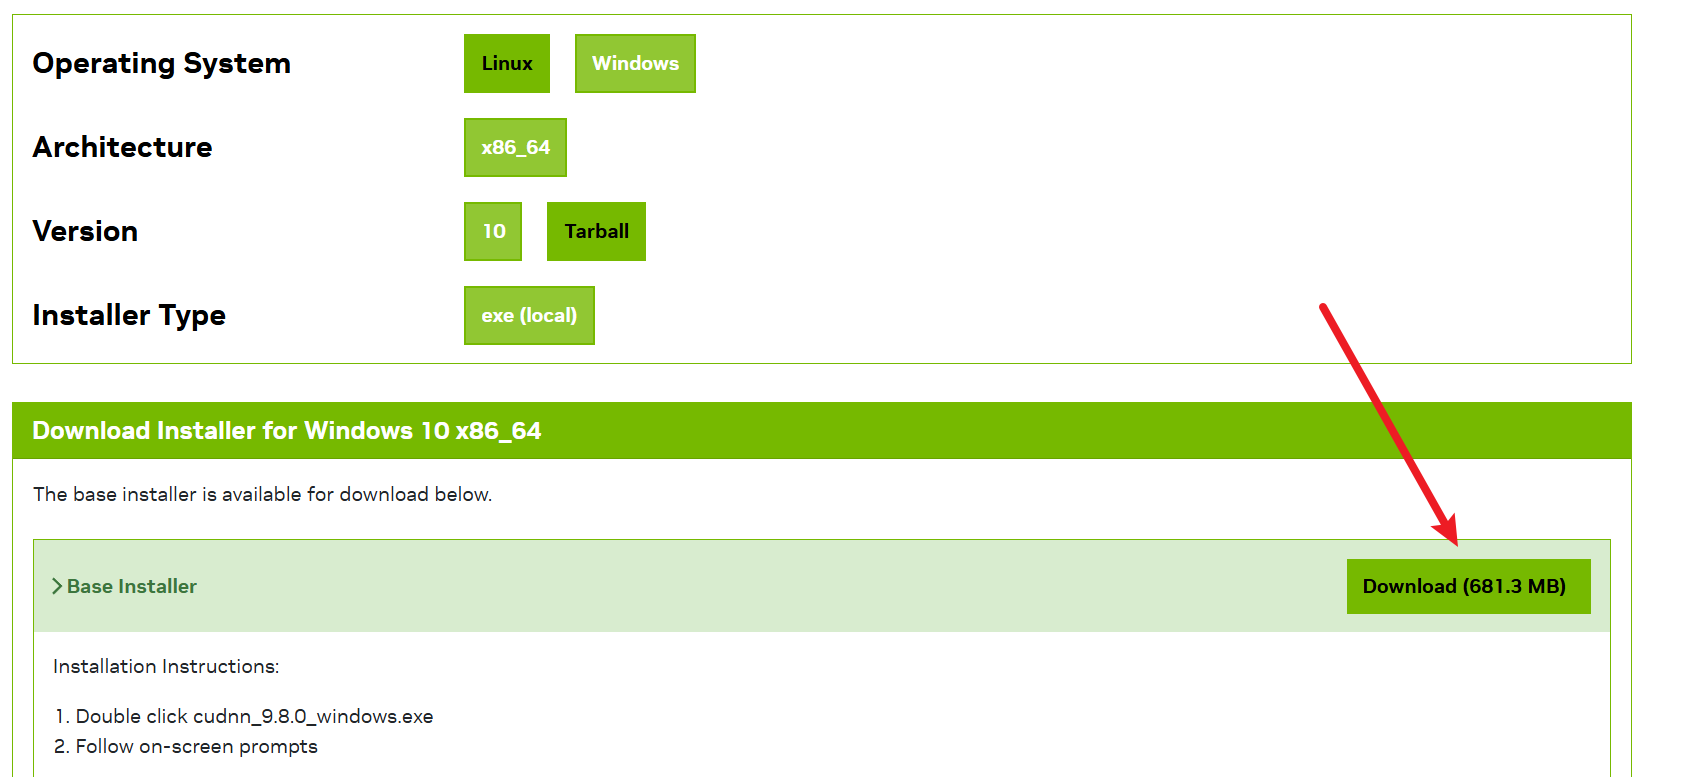
- 选择“Windows” > “x86_64” > “10” > “exe (local)”,点击“Download”。
- 文件名大概是
cuda_12.8.1_572.61_windows.exe,会下载到你的“下载”文件夹。
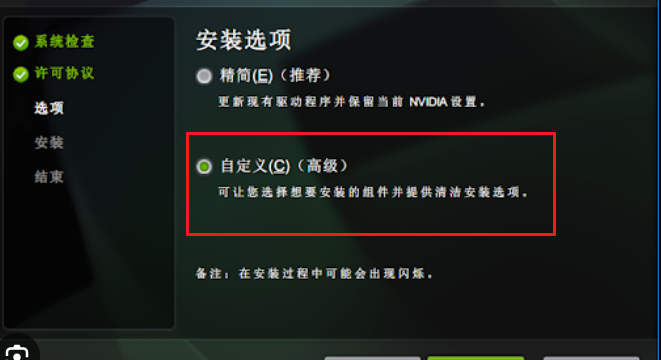
- 安装 CUDA(自定义模式)
双击下载的文件,弹出安装窗口,同意协议并下一步。
选择“自定义(高级)”安装,点击“下一步”。
在选项列表里,只勾选第一行的“CUDA”,其他都去掉勾选,避免冲突。
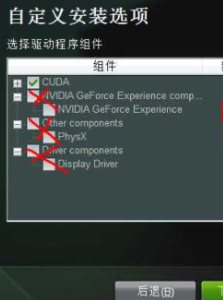
然后点击
CUDA前的+号,去掉Visual Studio Integration,否则容易安装失败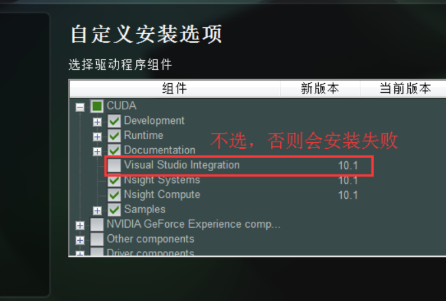
点击“下一步”,按提示完成安装,默认路径是
C:\Program Files\NVIDIA GPU Computing Toolkit\CUDA\v12.6。
遇到错误怎么办?
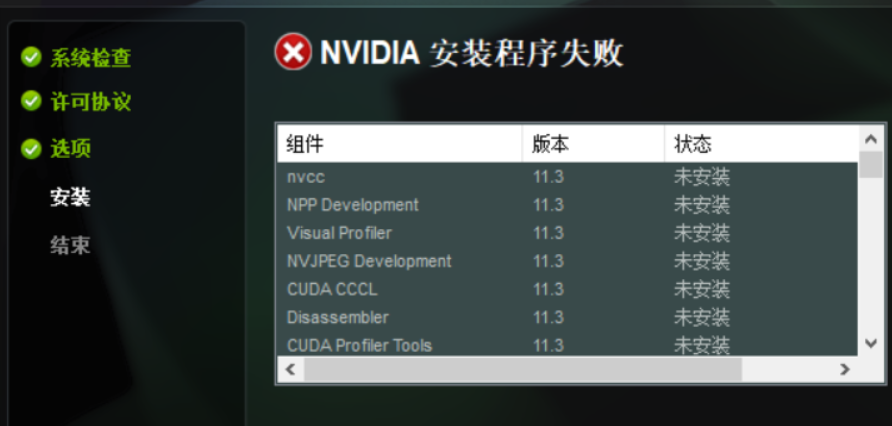
- 如果安装中断,提示“未安装”或“失败”,可能是选项没选对。重新运行安装程序,选择自定义安装,确保只选第一行的CUDA”,其他全取消,并且点开 CUDA 取消
Visual Studio Integration。 - 如果还是出错,跳到下一步安装 Visual Studio。
- 如果安装中断,提示“未安装”或“失败”,可能是选项没选对。重新运行安装程序,选择自定义安装,确保只选第一行的CUDA”,其他全取消,并且点开 CUDA 取消
第五步:安装 Visual Studio(如果 CUDA 安装失败)
上一步如果取消了
Visual Studio Integration,应该不会出错,假如出错了,请照此安装 Visual Studio
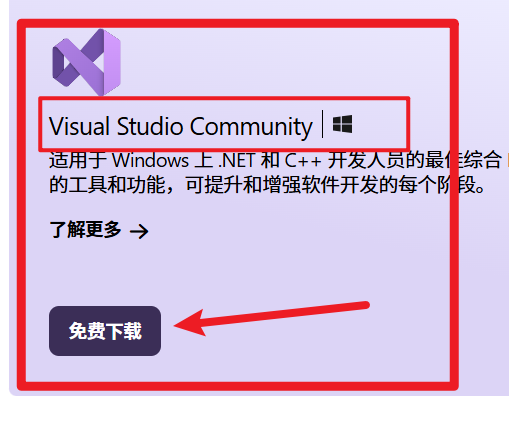
下载 Visual Studio 社区版
- 打开浏览器,进入:https://visualstudio.microsoft.com/zh-hans/free-developer-offers/
- 点击“免费下载 Visual Studio Community”(社区版),下载安装器。
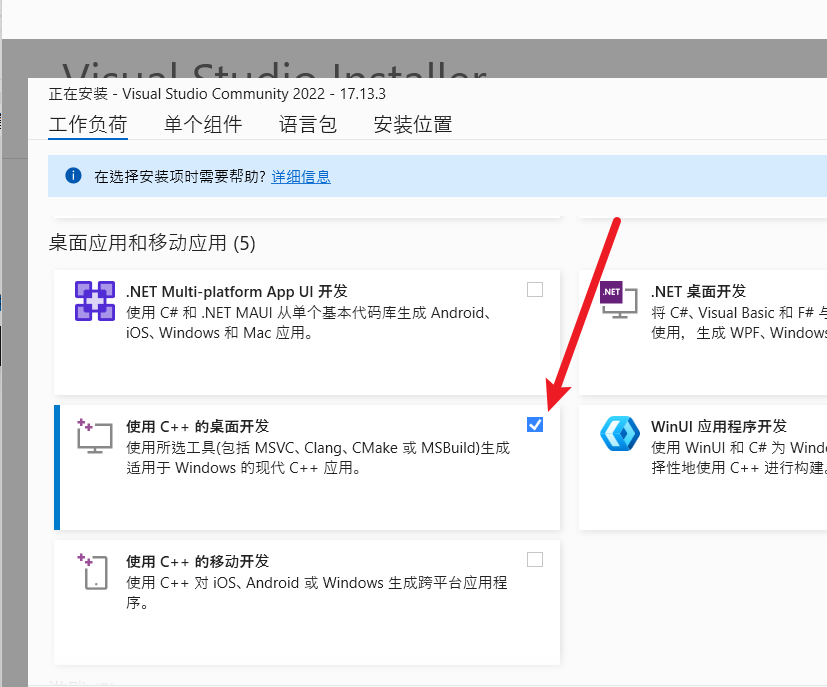
安装 C++ 开发环境
- 双击安装器,弹出窗口后选“桌面开发使用 C++”(Desktop development with C++)。
- 点击“安装”,可能需要几十分钟,装完后重启电脑。
- 重新安装 CUDA 12.6
- 回到第四步,重新运行 CUDA 安装程序,按自定义模式只选“Runtime”安装。这次应该能成功。
第六步:验证 CUDA 安装并配置环境变量
检查安装是否成功
- 打开 CMD(Windows 键 + R,输入
cmd)。 - 输入:
nvcc -V 如果显示 Cuda compilation tools, release 12.6, V12.6.xxx,说明安装成功。如果提示“不是内部或外部命令”,需要加环境变量。
- 打开 CMD(Windows 键 + R,输入
添加 CUDA 到环境变量
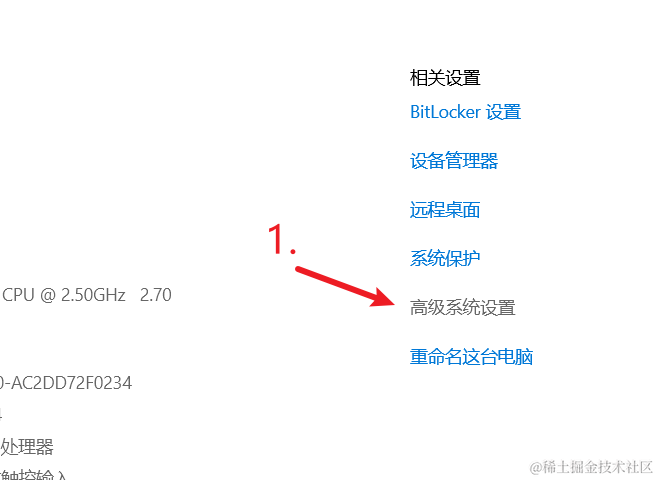
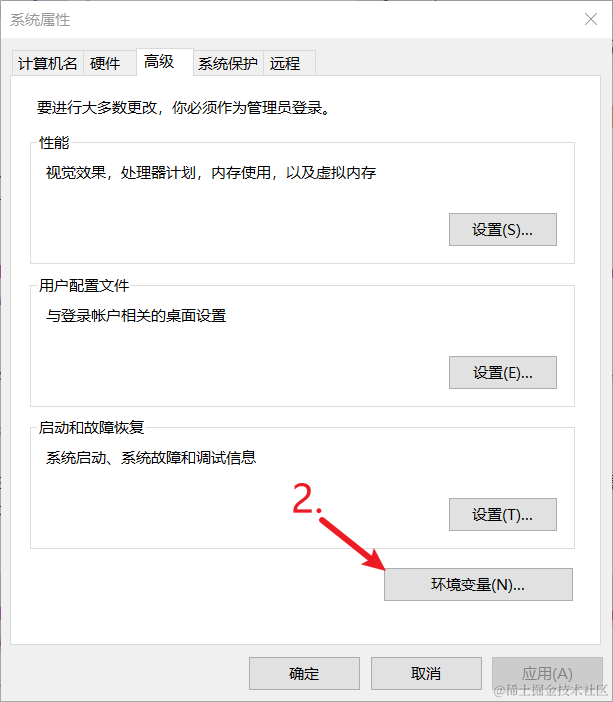
- 右键“此电脑”,选“属性” > “高级系统设置” > “环境变量”。
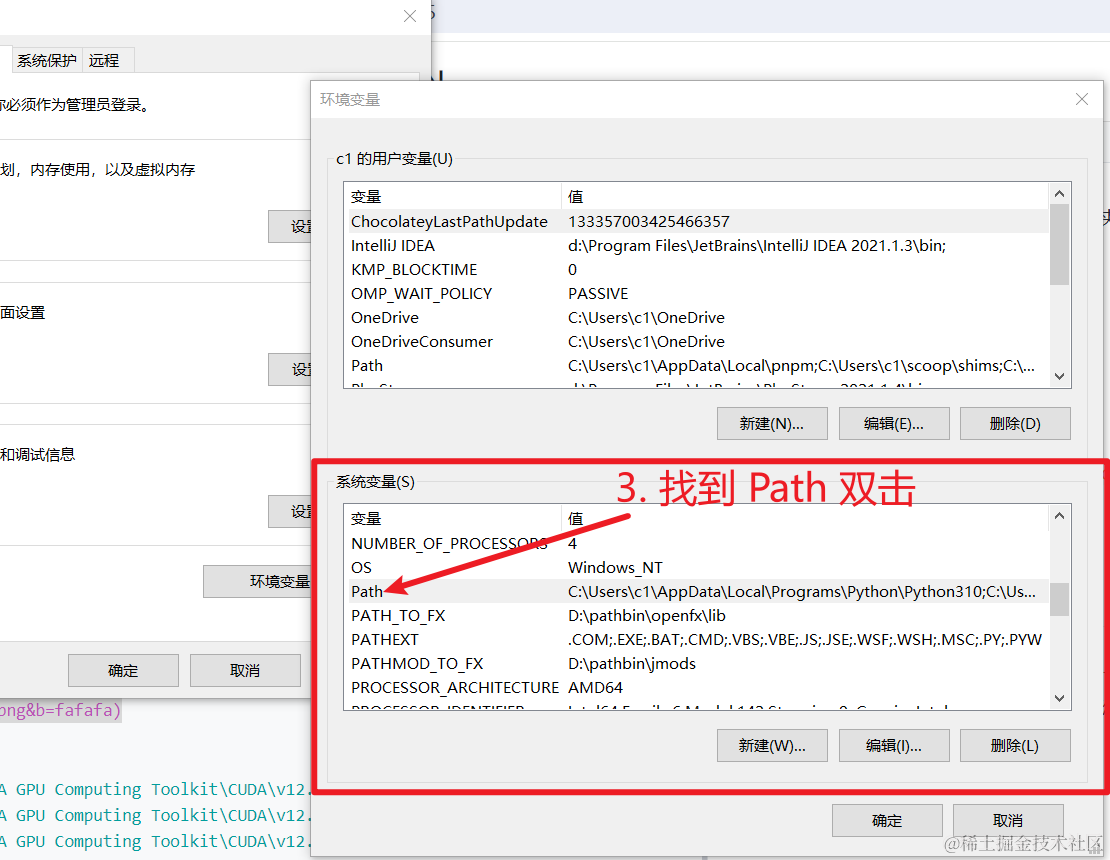
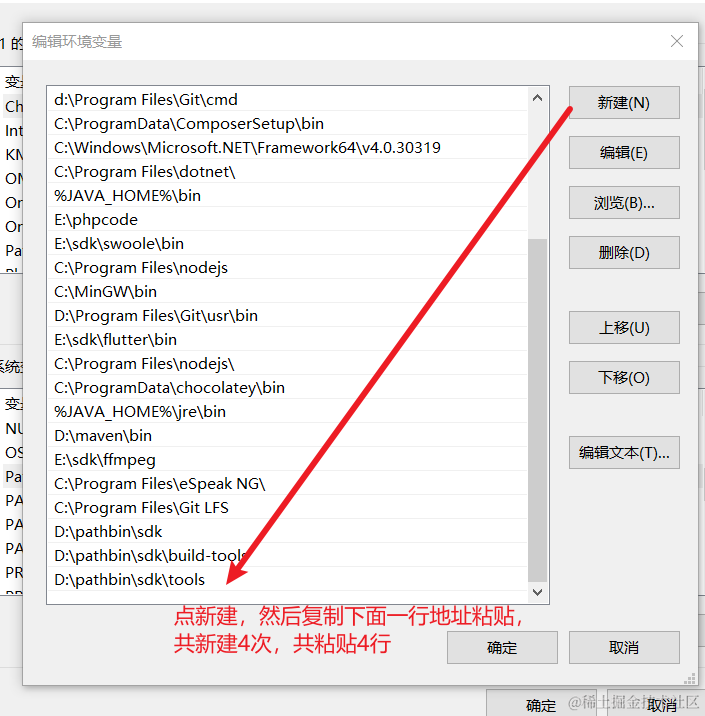
- 在“系统变量”的“Path”里,点击“新建”,输入:
C:\Program Files\NVIDIA GPU Computing Toolkit\CUDA\v12.6\bin C:\Program Files\NVIDIA GPU Computing Toolkit\CUDA\v12.6\lib C:\Program Files\NVIDIA GPU Computing Toolkit\CUDA\v12.6\include C:\Program Files\NVIDIA GPU Computing Toolkit\CUDA\v12.6\libnvvp - 点击“确定”保存,关闭所有窗口。
- 重新打开 CMD,输入
nvcc -V,应该能看到版本信息了。
第七步:安装 cuDNN 9.8
- 下载 cuDNN 9.8
- 打开浏览器,进入:https://developer.nvidia.com/cudnn-downloads?target_os=Windows&target_arch=x86_64&target_version=10&target_type=exe_local
- 可能需要登录英伟达账号(没有就注册一个,免费)。
- 选择“local版本”,下载 Windows 的
.exe文件
- 安装 cuDNN
- 双击下载的
.exe文件,按提示安装。
- 双击下载的
如果 cuDNN 安装后,程序中无法使用,可以打开安装目录,默认
C:\Program Files\NVIDIA\CUDNN\v9.8,复制libbininclude这3个文件夹,复制到C:\Program Files\NVIDIA GPU Computing Toolkit\CUDA\v12.6下覆盖。
最后:大功告成!
现在 CUDA 12.6 和 cuDNN 9.8 都装好了!你可以开始运行需要 GPU 支持的程序了。如果有软件说明(比如运行 python script.py),在 CMD 里进入项目文件夹,输入对应命令试试。