用 uv 轻松玩转 Python 项目:从安装到运行,一步到位!
Python 是个神奇的编程语言,背后有无数好玩的开源项目,比如 AI 工具、视频处理脚本等等。不过对于很多非程序员来说,想从 GitHub 上下载这些项目并跑起来,最大的拦路虎就是“依赖管理”和“版本管理”。
什么 pip、pyenv、venv、poetry、conda……光听名字就头晕,更别提折腾半天还跑不通。好消息是,最近有个新工具叫 uv,它简单、快速、靠谱,特别适合小白用户。今天,我就带你一步步试试 uv,从安装到运行一个项目,保证你看完就能上手!
一、Windows 上安装 uv:两分钟搞定
首先,咱们得把 uv 装到你的 Windows 电脑上。别担心,不需要什么复杂的操作,跟着我走就行。
- 下载并安装:
- 开始菜单-找到 Windows PowerShell(右键选择“以管理员身份运行”更稳妥)。
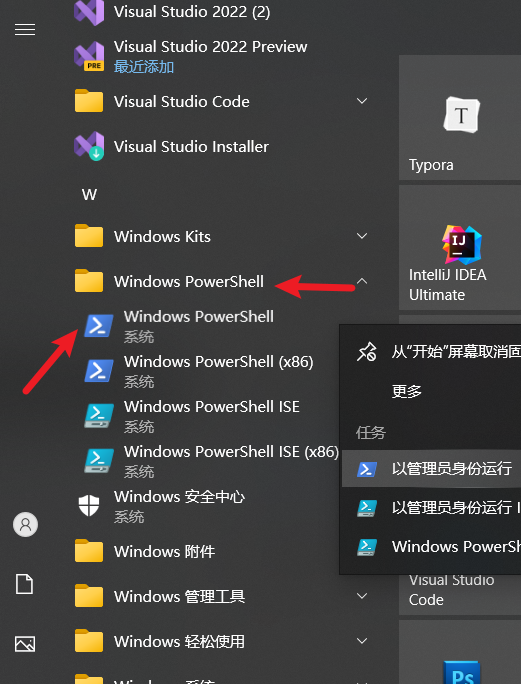
- 复制这条命令粘贴进去,然后回车:bash
powershell -ExecutionPolicy ByPass -c "irm https://astral.sh/uv/install.ps1 | iex" - 这条命令会从 uv 官网下载安装脚本并自动运行。过程大概几秒到一两分钟,看网速。完成后,命令行会提示类似“uv installed successfully”之类的话。
- 验证一下:输入
uv --version,如果显示类似“uv 0.x.x”的版本号,恭喜你,安装成功!
安装完 uv,它会静静地待在你的电脑里,随时准备帮你干活。接下来,咱们用它创建一个新项目。
二、创建新项目:指定 Python 3.10,缺啥补啥
后续命令可以使用
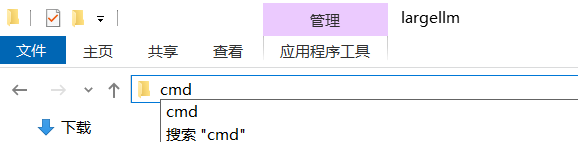
CMD控制台也可以使用PowerShell,直接在某个文件夹地址栏里清空原内容,输入PowerShell或cmd回车即可打开
假设你想试试某个 AI 项目,但它需要 Python 3.10,而你电脑上可能没有这个版本。uv 的强大之处就在于,它能自动帮你下载并设置好。
- 新建项目文件夹:
- 在桌面或随便哪里,建个文件夹,比如叫“myai”,进入该文件夹,并打开cmd控制台
- 创建项目并指定 Python 3.10:
- 输入这条命令:
uv init myai --python 3.10 - uv 会创建一个新项目。如果电脑上没 Python 3.10,它会自动从网上下载(可能要几分钟),然后在文件夹里生成一个虚拟环境(类似一个独立的小房间,只为这个项目服务)。
- 输入这条命令:
- 看看成果:文件夹里会多出几个文件,比如
pyproject.toml(项目的“说明书”)和.python-version(记着你用的 Python 版本)。
现在,你有了一个干净的项目环境,咱们往里加点东西吧!
三、添加、移除、更新第三方模块:像点外卖一样简单
AI 项目通常需要一些“第三方模块”(比如处理数据的工具包),uv 让这件事变得像点外卖一样直观。
- 添加模块:
- 假设项目需要
numpy(一个数学计算工具),输入:uv add numpy - uv 会把
numpy加到pyproject.toml里,同时下载安装到虚拟环境,几秒钟搞定。
- 假设项目需要
- 移除模块:
- 如果你觉得
numpy用不上,输入:uv remove numpy - 它会从项目里删掉,干干净净。
- 如果你觉得
- 更新模块:
- 想用最新版的
numpy?输入:uv add numpy --upgrade - uv 会检查最新版本并更新,省得你手动查。
- 想用最新版的
这些命令会自动保持项目依赖一致,不用操心版本冲突。接下来,咱们跑个 Python 文件试试。
四、运行 Python 文件:一键启动
假设你在项目里写了个简单的 test.py,内容是打印“Hello, AI!”:
print("Hello, AI!")直接输入:
uv run python test.py屏幕上就会出现“Hello, AI!”。uv 会自动用项目里的 Python 3.10 环境运行,省去你激活环境的麻烦。如果文件里有依赖(比如用了 numpy),uv 也会确保它们都就位。
五、从 GitHub 克隆项目并跑起来:以 pyvideotrans 为例
现在,咱们试试从 GitHub 下载一个真实项目,比如 pyvideotrans(一个视频翻译工具,地址:https://github.com/jianchang512/pyvideotrans.git),然后用 uv 配置并运行。
- 克隆仓库:
- 先装个 Git(去
https://git-scm.com/downloads/win下载,安装时一路“下一步”就好)。安装后需要重新打开 PowerShell或cmd终端。 - 在 PowerShell或cmd终端 里输入:
git clone https://github.com/jianchang512/pyvideotrans.git
- 先装个 Git(去

- 这会把项目下载到当前文件夹下的
pyvideotrans目录。
- 进入项目目录:
- 输入
cd pyvideotrans。
- 输入
- 用 uv 初始化并指定 Python 3.10:
- 输入:
uv init --python 3.10 - uv 会检查 Python 3.10(没有就下载),并为项目创建一个虚拟环境。
- 输入:
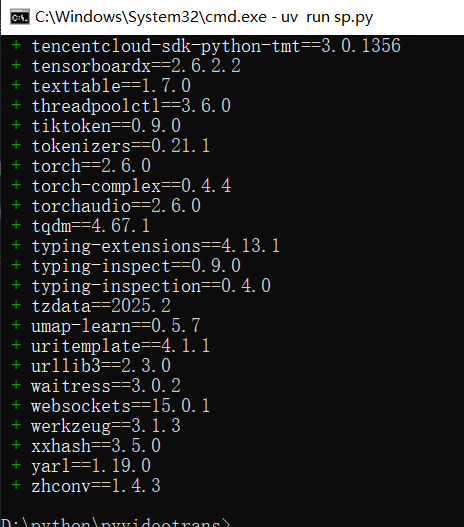
- 安装依赖:
- 项目自带个
requirements.txt文件,列了所需的模块。输入:uv pip sync requirements.txt
- 项目自带个

- uv 会根据这个文件安装所有依赖,比如
torch、requests等等,torch较大,可能需要较长时间。
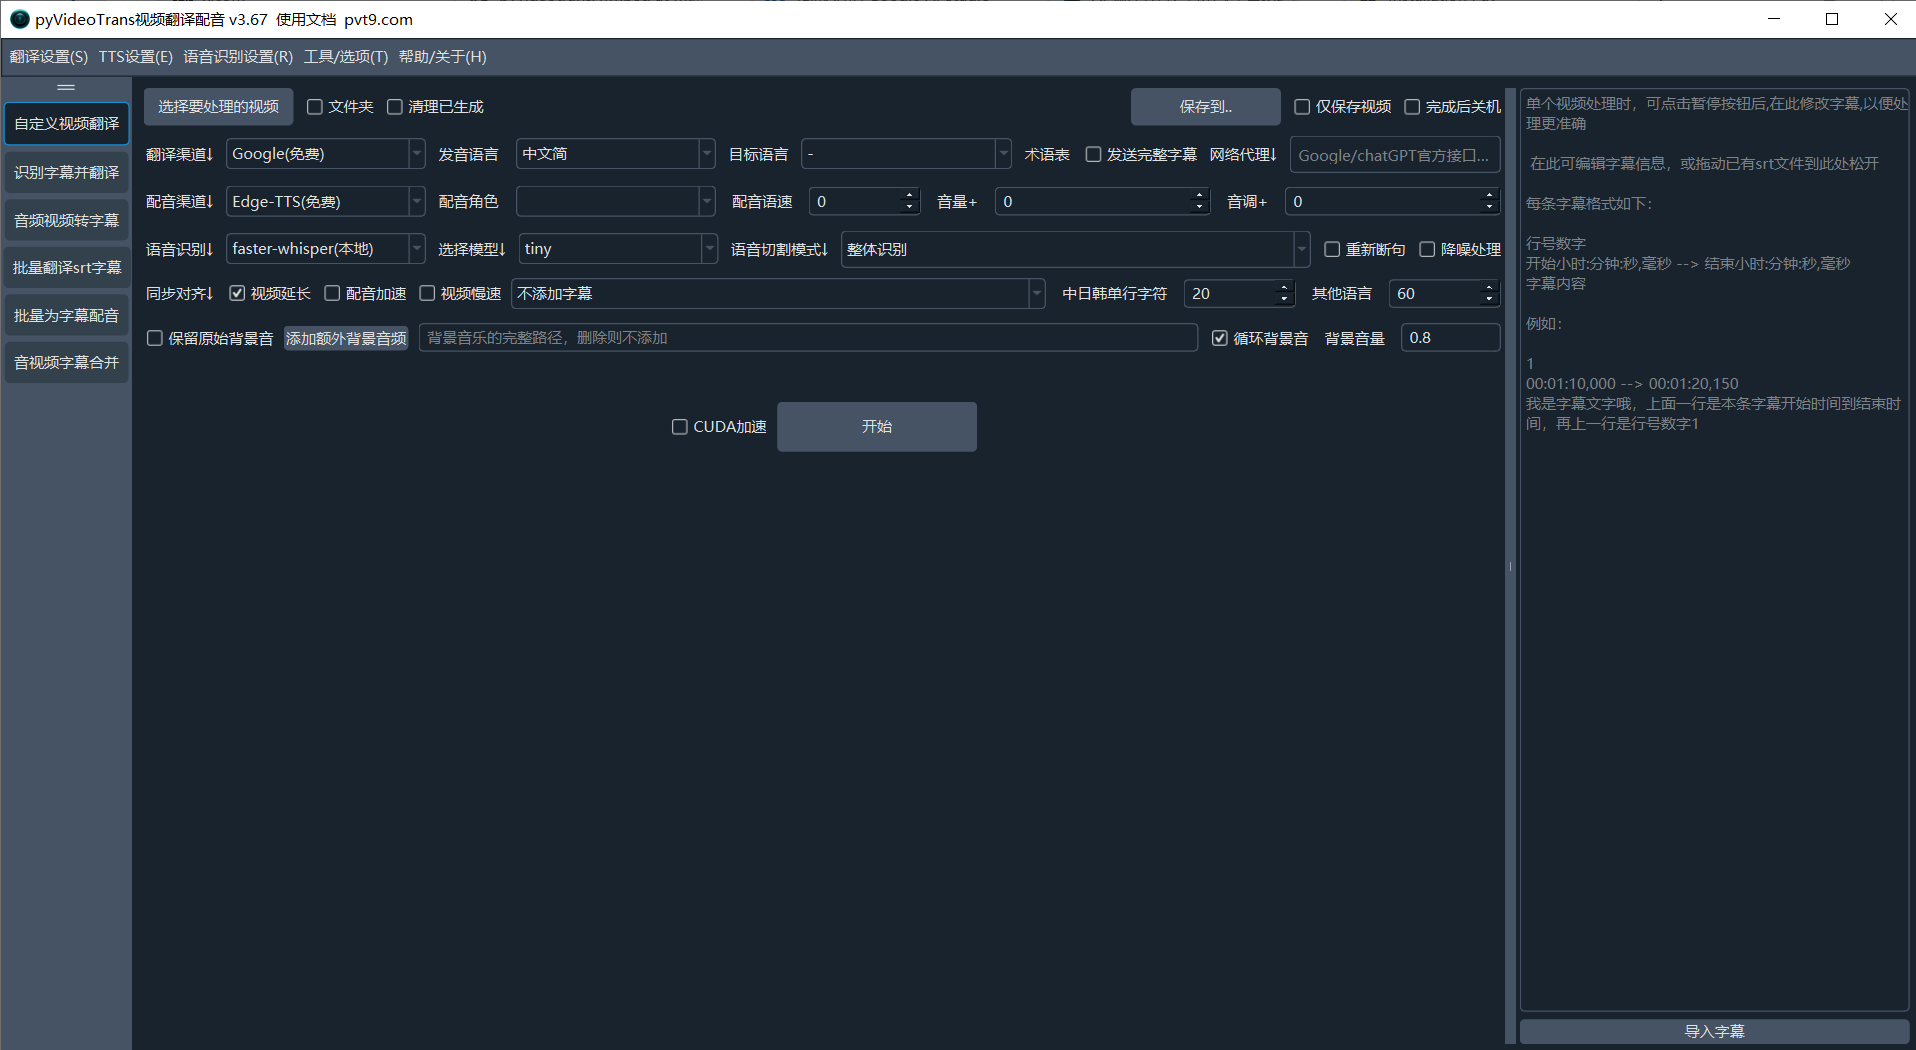
- 运行 sp.py:
- 输入:
uv run sp.py - 如果一切顺利,项目就启动了!你可以按照它的说明试试翻译视频。
- 输入:
整个过程是不是很简单?uv 把复杂的依赖管理藏在幕后,你只需要几条命令就能搞定。
六、uv 的几大功能和常用命令:小结一下
uv 是个全能选手,特别适合像你这样喜欢折腾 GitHub 项目的人。它有啥厉害的地方呢?
- 超快安装:比传统工具(如 pip)快 10-100 倍。
- 环境管理:自动创建虚拟环境,不用手动激活,想用哪个 Python 版本就指定哪个。
- 依赖管理:支持
pyproject.toml和requirements.txt,添加、移除、更新模块一键搞定。 - 一键运行:用
uv run直接跑脚本,不用管环境配置。
常用命令速查:
uv --version:检查 uv 版本。uv init 项目名 --python 3.10:创建新项目并指定 Python 版本。uv add 模块名:添加模块。uv remove 模块名:移除模块。uv pip sync requirements.txt:安装依赖文件里的模块。uv run 文件名:运行 Python 文件。