Spark-TTS 是最近备受瞩目的一个语音克隆开源项目,由香港科技大学、西北工业大学、上海交通大学等多所高校联合研发。经过本地测试,其效果与 F5-TTS 不相上下。
Spark-TTS 支持中英文语音克隆,安装部署过程并不复杂。本文将详细介绍如何安装部署,并进行修改,使其兼容 F5-TTS 的 API 接口,从而可以直接在 pyVideoTrans 软件的 F5-TTS 配音渠道中使用。
前提条件: 确保已安装 Python 3.10、3.11 或 3.12 版本。
1. 下载Spark-TTS源码
首先,在非系统盘创建一个由英文或数字组成的文件夹,例如 D:/spark。之所以要求使用英文、数字且非系统盘,是为了尽量避免可能出现的中文、权限等方面的错误。
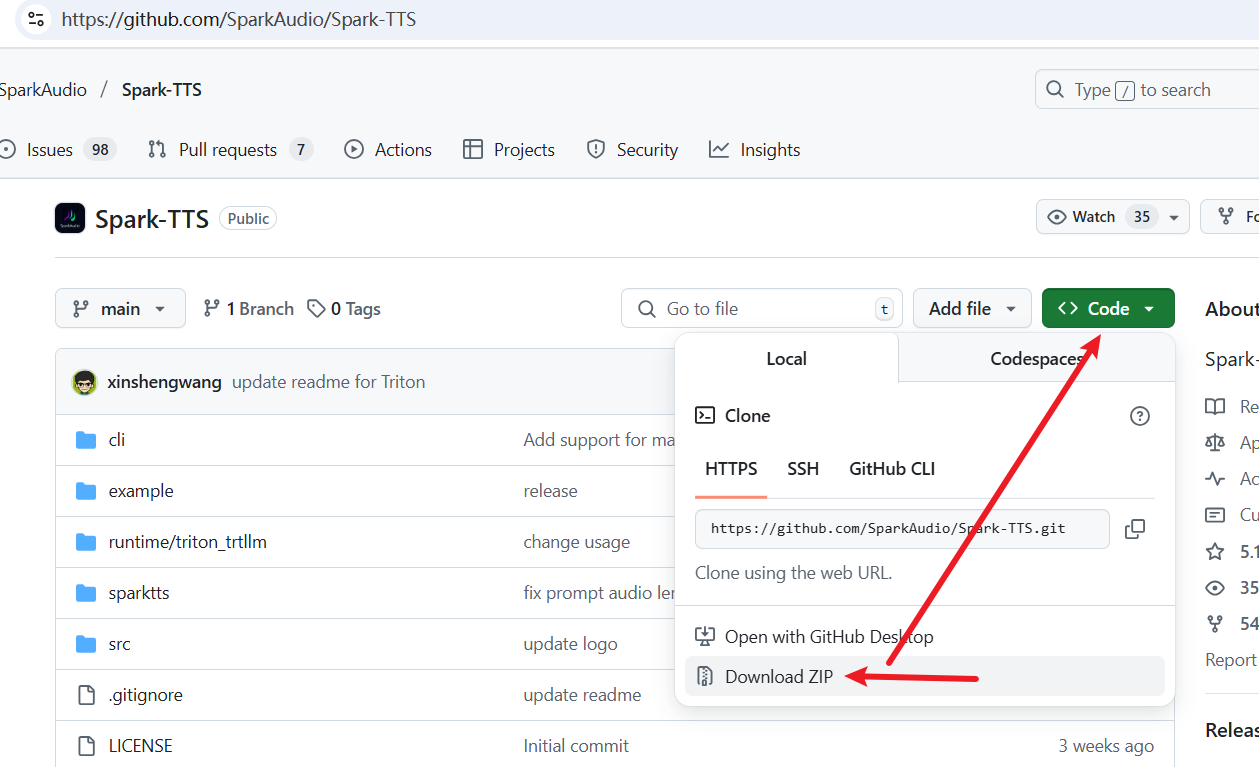
然后,访问 Spark-TTS 官方代码仓库:https://github.com/SparkAudio/Spark-TTS
如下图所示,点击下载源码的 ZIP 包:
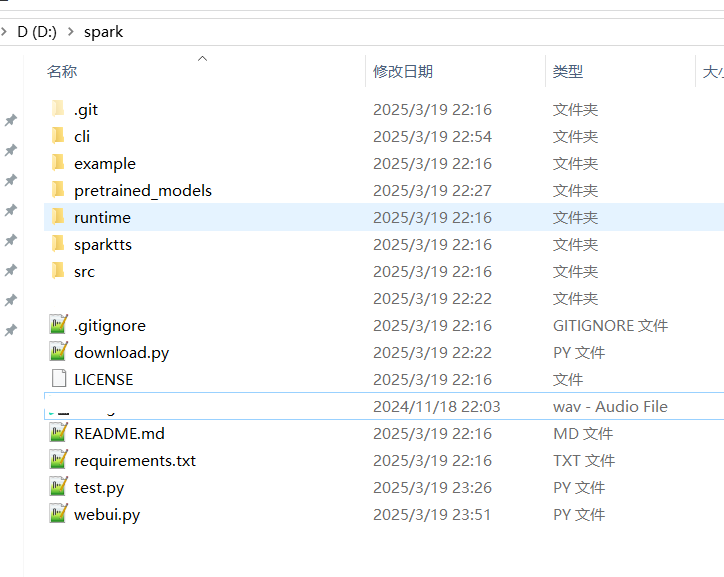
下载完成后解压,将所有文件和文件夹复制到 D:/spark 文件夹中。复制后的目录结构应如下图所示:
2. 创建虚拟环境并安装依赖
- 创建虚拟环境
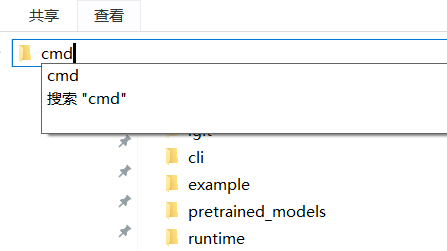
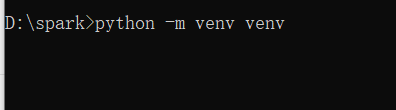
在该文件夹地址栏输入 cmd 并回车,在弹出的黑色终端窗口中执行以下命令:
python -m venv venv如图:
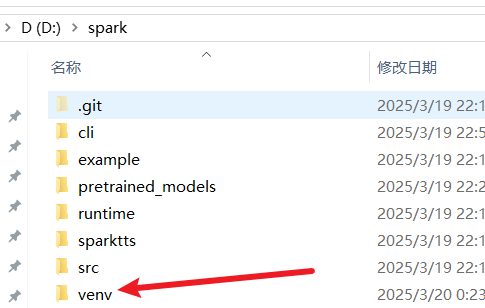
执行后,D:/spark 目录下会多出一个 venv 文件夹:
注意: 如果在执行时提示
python 不是内部或外部命令,说明没有安装 Python 或没有将其添加到系统环境变量中,请参考相关文章安装 Python。
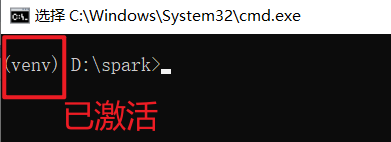
接下来,执行 venv\scripts\activate 激活虚拟环境。激活后,终端行首会出现 (venv) 字样,表示激活成功。后续所有命令都需要在此环境下执行,每次执行前请检查是否已激活。
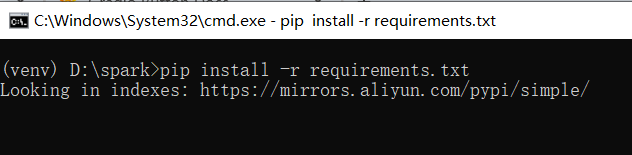
- 安装依赖
在已激活的虚拟环境中,继续在终端中执行以下命令,安装所有依赖:
pip install -r requirements.txt安装过程可能需要较长时间,请耐心等待。
3. 下载模型
开源 AI 项目所需的模型通常托管在 Hugging Face (huggingface.co) 上。由于该网站在国内已被屏蔽,因此需要科学上网才能下载模型。请确保已配置好科学上网环境,并设置了系统代理。
在当前目录 D:/spark 下创建一个名为 down.txt 的文本文件,将以下代码复制粘贴到文件中并保存:
from huggingface_hub import snapshot_download
snapshot_download("SparkAudio/Spark-TTS-0.5B", local_dir="pretrained_models/Spark-TTS-0.5B")
print('下载完成')然后,在已激活虚拟环境的终端窗口中执行以下命令:
python down.txt注意检查命令行前是否存在 (venv):

等待终端提示下载完成。
如果输出类似以下信息,说明网络连接错误,可能是科学上网环境配置不正确:
Returning existing local_dir `pretrained_models\Spark-TTS-0.5B` as remote repo cannot be accessed in `snapshot_download` ((MaxRetryError("HTTPSConnectionPool(host='huggingface.co', port=443): Max retries exceeded with url: /api/models/SparkAudio/Spark-TTS-0.5B/revision/main (Caused by ConnectTimeoutError(<urllib3.connection.HTTPSConnection object at 0x000001BC4C8A4430>, 'Connection to huggingface.co timed out. (connect timeout=None)'))"), '(Request ID: aa61d1fb-ffc7-4479-9a99-2258c1bc0aee)')).
4. 启动 Web 界面
模型下载完成后,就可以启动并打开 Web 界面了。
在已激活虚拟环境的终端中执行以下命令:
python webui.py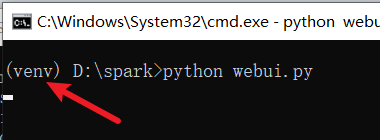
等待出现如下信息时,表示启动完成:
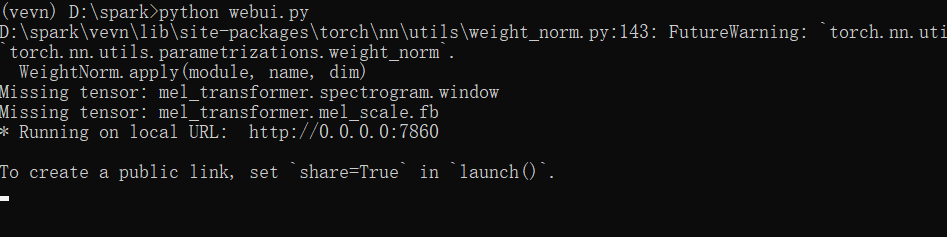
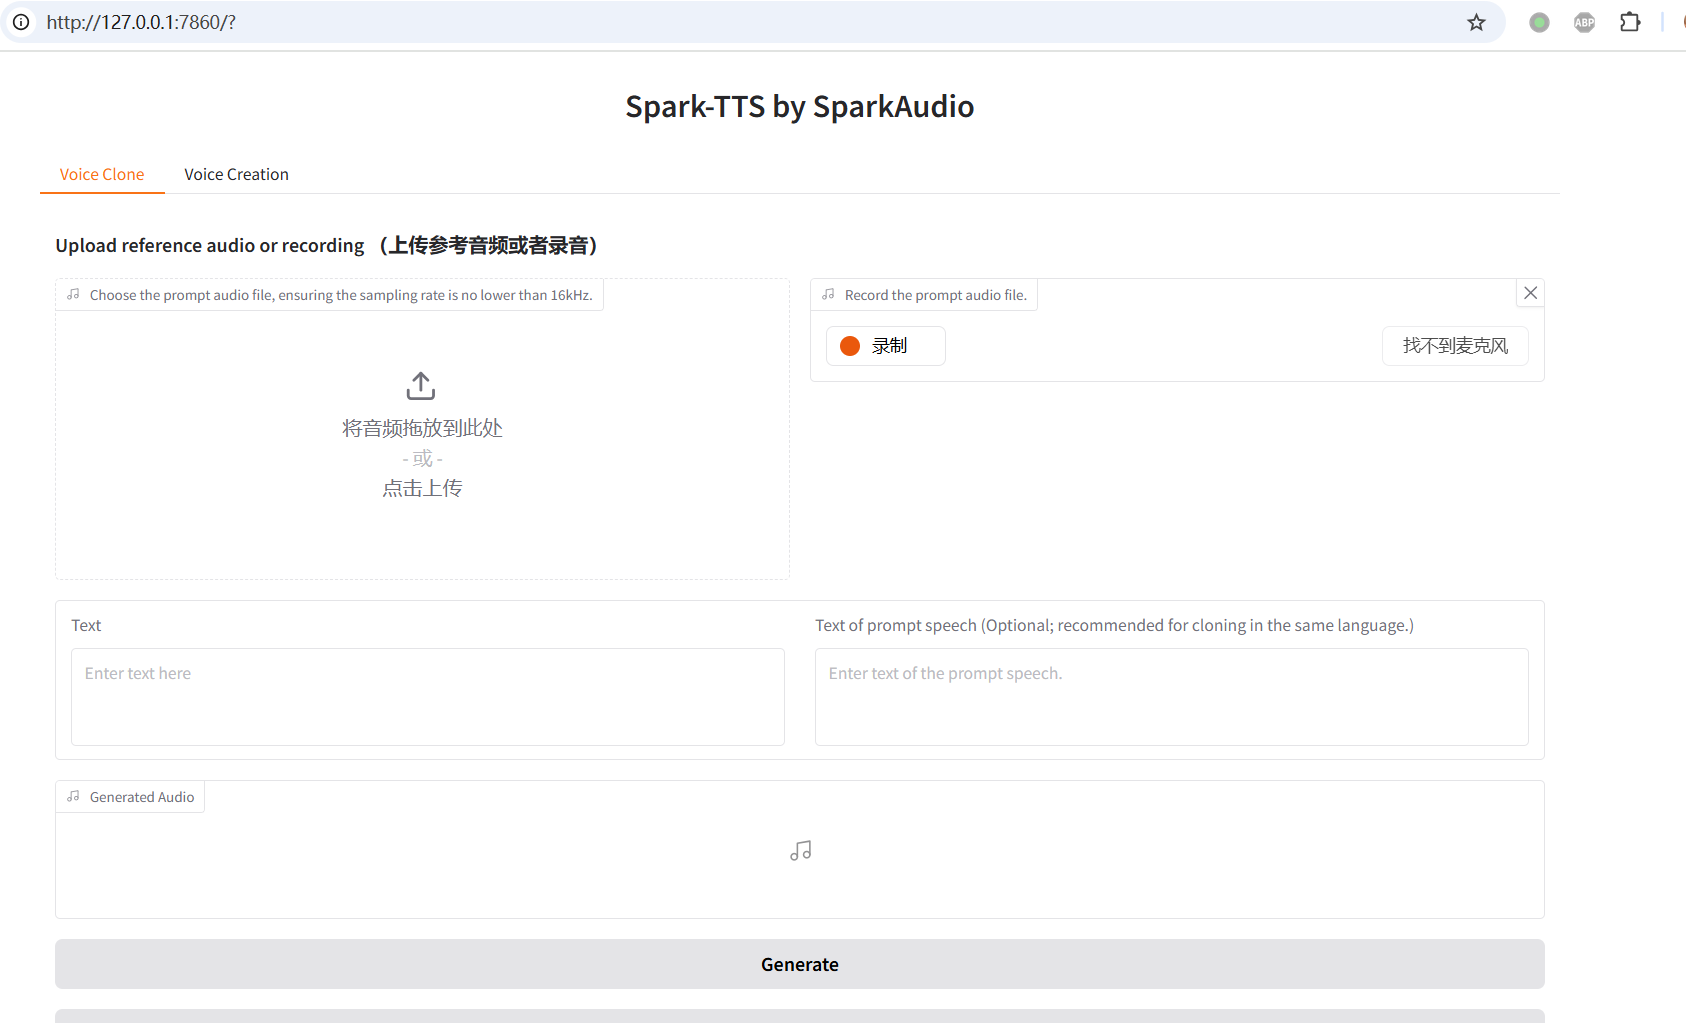
此时,可以在浏览器中打开地址 http://127.0.0.1:7860,Web 界面如下图所示:
5. 语音克隆测试
如下图所示,选择一个你想要克隆音色的音频文件(时长 3-10 秒,发音清晰,背景干净)。
然后在右侧 Text of prompt speech 中输入该音频对应的文本内容,左侧输入你希望生成的语音文本,最后点击底部的 Generate 按钮开始执行。
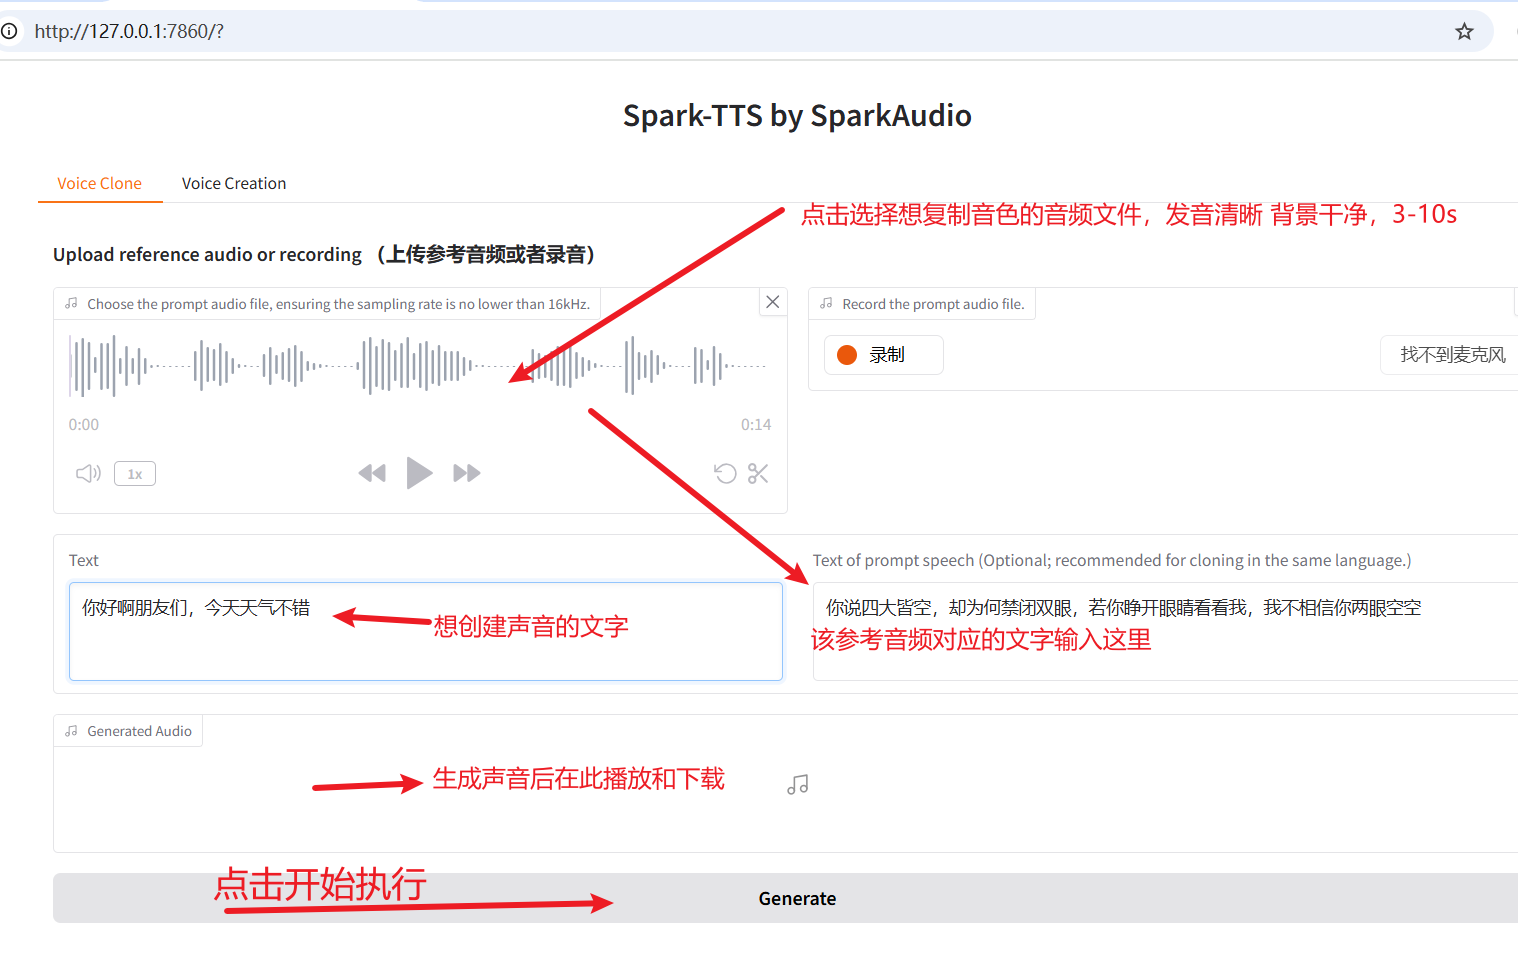
执行完成后,如下图所示。
6. 在 pyVideotrans 软件中使用
Spark-TTS 与 F5-TTS 非常相似,只需进行简单修改,就可以直接在 pyVideotrans 的 F5-TTS 配音渠道中使用 Spark-TTS。 如果你不会修改,可直接下载修改好的版本,覆盖该
webui.py,下载地址:https://pvt9.com/spark-use-f5-webui.zip
- 打开
webui.py文件,在大约第 135 行的上方粘贴以下代码:
    def basic_tts(gen_text_input, ref_text_input, ref_audio_input,remove_silence=None,speed_slider=None):
        """
        Gradio callback to clone voice using text and optional prompt speech.
        - text: The input text to be synthesised.
        - prompt_text: Additional textual info for the prompt (optional).
        - prompt_wav_upload/prompt_wav_record: Audio files used as reference.
        """
        prompt_speech = ref_audio_input
        prompt_text_clean = None if len(ref_text_input) < 2 else ref_text_input

        audio_output_path = run_tts(
            gen_text_input,
            model,
            prompt_text=prompt_text_clean,
            prompt_speech=prompt_speech
        )
        return audio_output_path,prompt_text_clean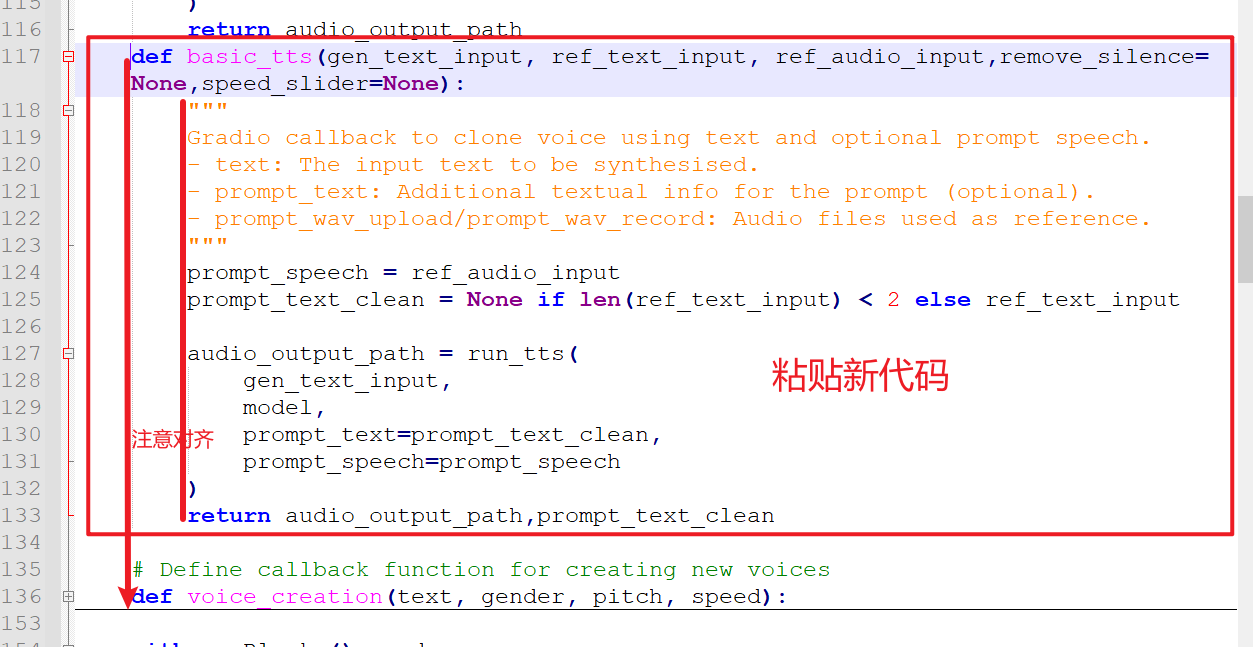
特别注意: Python 代码使用空格进行缩进对齐,否则代码会报错。为避免出错,建议不要使用记事本打开 webui.py 文件,而是使用专业的代码编辑器,例如 Notepad++ 或 VSCode 等免费工具。
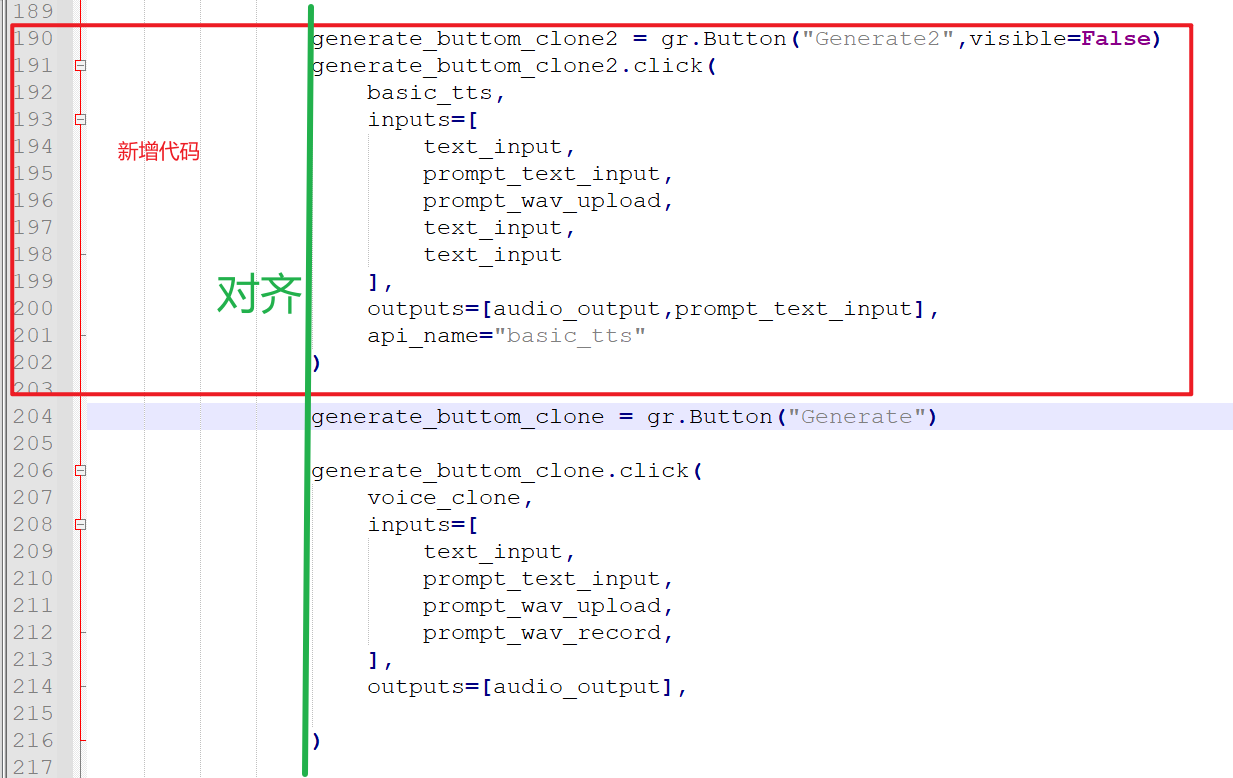
- 然后,找到大约第 190 行的
generate_buttom_clone = gr.Button("Generate")代码。 在其上方粘贴以下代码,同样必须注意对齐:
generate_buttom_clone2 = gr.Button("Generate2",visible=False)
generate_buttom_clone2.click(
       basic_tts,
       inputs=[
          text_input,
          prompt_text_input,
          prompt_wav_upload,
          text_input,
          text_input
       ],
       outputs=[audio_output,prompt_text_input],
       api_name="basic_tts"
 )
- 保存文件后,重新启动
webui.py:
python webui.py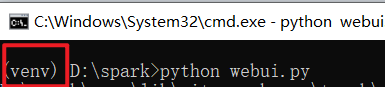
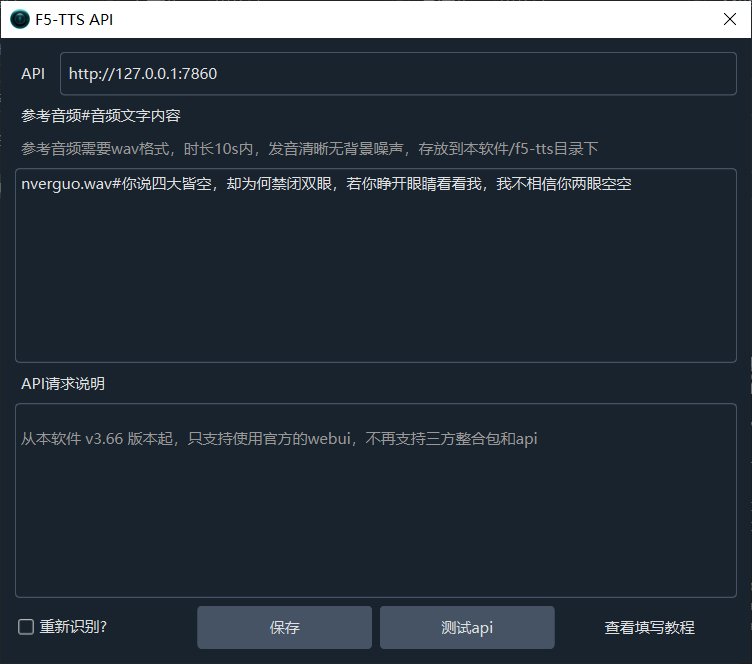
- 将地址
http://127.0.0.1:7860填写到 pyVideotrans 软件的 “菜单” -> “TTS 设置” -> “F5-TTS” 的 API 地址中,即可开始使用。参考音频的位置和填写方式与 F5-TTS 的使用方法一致。