Chatterbox TTS 配音渠道
v4.01版本后,Chatterbox-TTS 改为内置,可直接使用,无需单独部署该页面底部所说的 API 服务
第一次使用将在线下载模型,如果下载失败,也可以打开该页面 (https://huggingface.co/ResembleAI/chatterbox/tree/main ),手动将 所有文件下载到
软件目录/models/chatterbox文件夹内
v4.01 之前的版本仍需部署以下 API 服务
这是一个基于 Chatterbox-TTS 的高性能文字转语音(TTS)服务。它提供了一个与 OpenAI TTS 兼容的 API 接口、一个支持声音克隆的增强接口,以及一个简洁的 Web 用户界面。
本项目旨在为开发者和内容创作者提供一个私有化部署、功能强大且易于集成的 TTS 解决方案。
在 pyVideoTrans 中使用
本项目可以作为强大的 TTS 后端,为 pyVideoTrans 提供高质量的英文配音。
启动本项目: 确保 Chatterbox TTS API 服务正在本地运行 (
http://127.0.0.1:5093)。更新 pyVideoTrans: 确保您的 pyVideoTrans 版本升级到
v3.73或更高。配置 pyVideoTrans:
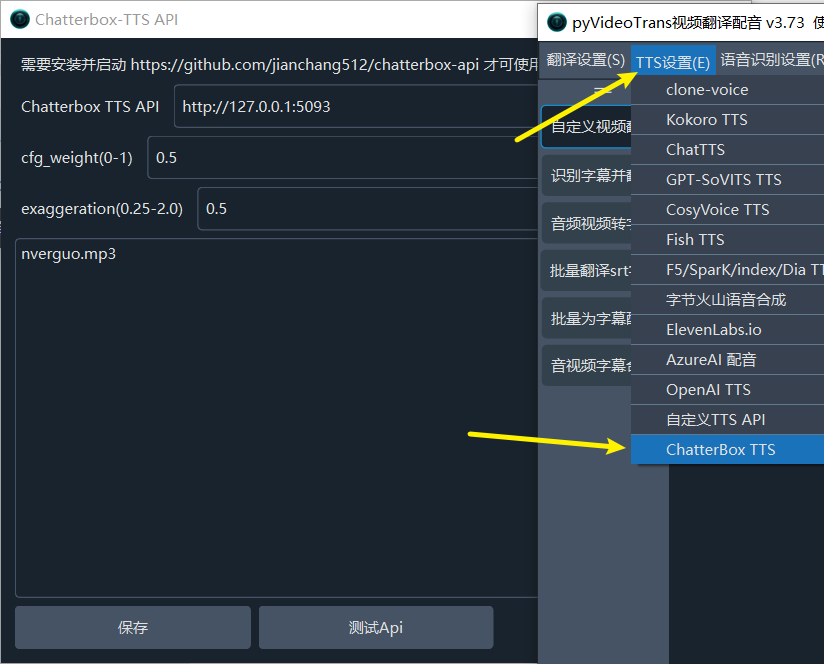
- 在 pyVideoTrans 菜单中,进入
TTS设置->Chatterbox TTS。 - API 地址: 填写本服务的地址,默认为
http://127.0.0.1:5093。 - 参考音频 (可选): 如果您想使用声音克隆,请在此处填写参考音频的文件名(例如
my_voice.wav)。请确保该音频文件已放置在 pyVideoTrans 根目录下的chatterbox文件夹内。 - 调整参数: 根据需要调整
cfg_weight和exaggeration以获得最佳效果。
参数调整建议:
- 通用场景 (TTS, 语音助手): 默认设置 (
cfg_weight=0.5,exaggeration=0.5) 适用于大多数情况。 - 快语速参考音频: 如果参考音频的语速较快,可以尝试将
cfg_weight降低到0.3左右,以改善生成语音的节奏。 - 富有表现力/戏剧性演讲: 尝试较低的
cfg_weight(如0.3) 和较高的exaggeration(如0.7或更高)。通常提高exaggeration会加快语速,降低cfg_weight有助于平衡,使节奏更从容、更清晰。
- 在 pyVideoTrans 菜单中,进入
快速开始方式一:Windows 用户
我们为 Windows 用户准备了包含所有依赖的便携包 win.7z,大大简化了安装过程。
- 下载并解压:
百度网盘下载地址【内置模型共4G(CPU运行,GPU方法见下文)】https://pan.baidu.com/s/1zXzRAQ0P7X8LJp4OrCvw7w?pwd=1234
- 启动服务:
双击运行根目录下的 启动服务.bat 脚本。
当您在命令行窗口看到类似以下信息时,表示服务已成功启动:
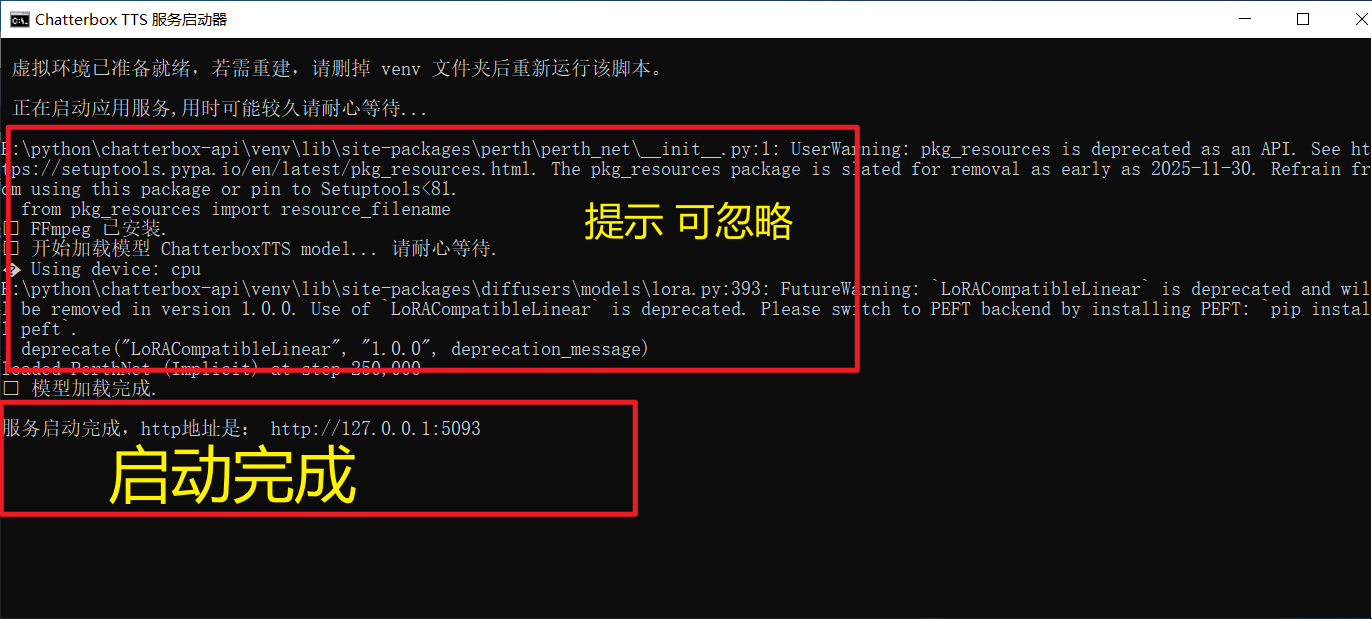
    ✅ 模型加载完成.
服务启动完成,http地址是: http://127.0.0.1:5093方式二:macOS, Linux 和手动安装用户
对于 macOS, Linux 用户,或者希望手动设置环境的 Windows 用户,请按照以下步骤操作。
1. 前置依赖
- Python: 确保已安装 Python 3.9 或更高版本。
- ffmpeg: 这是一个必需的音视频处理工具。
- macOS (使用 Homebrew):
brew install ffmpeg - Debian/Ubuntu:
sudo apt-get update && sudo apt-get install ffmpeg - Windows (手动): 下载 ffmpeg ,并将其添加到系统环境变量
PATH中。
- macOS (使用 Homebrew):
2. 安装步骤
# 1. 克隆项目仓库
git clone https://github.com/jianchang512/chatterbox-api.git
cd chatterbox-api

# 2. 创建并激活 Python 虚拟环境 (推荐)
python3 -m venv venv
# on Windows:
# venv\Scripts\activate
# on macOS/Linux:
source venv/bin/activate

# 3. 安装依赖
pip install -r requirements.txt

# 4. 启动服务
python app.py当服务成功启动后,您将在终端看到服务地址 http://127.0.0.1:5093。
⚡ 升级到 GPU 版本 (可选)
如果您的电脑配备了支持 CUDA 的 NVIDIA 显卡,并已正确安装 NVIDIA 驱动 和 CUDA Toolkit,您可以升级到 GPU 版本以获得显著的性能提升。
Windows 用户 (一键升级)
- 请先确保您已经成功运行过一次
启动服务.bat,以完成基础环境的安装。 - 双击运行
安装N卡GPU支持.bat脚本。 - 脚本会自动卸载 CPU 版本的 PyTorch,并安装与 CUDA 12.6 兼容的 GPU 版本。
Linux 手动升级
在激活虚拟环境后,执行以下命令:
# 1. 卸载现有的 CPU 版本 PyTorch
pip uninstall -y torch torchaudio

# 2. 安装与您的 CUDA 版本匹配的 PyTorch
# 以下命令适用于 CUDA 12.6,请根据您的 CUDA 版本从 PyTorch 官网获取正确的命令
pip install torch torchaudio --index-url https://download.pytorch.org/whl/cu126您可以访问 PyTorch 官网 来获取适合您系统的安装命令。
升级后,重新启动服务,您将在启动日志中看到 Using device: cuda。
📖 使用指南
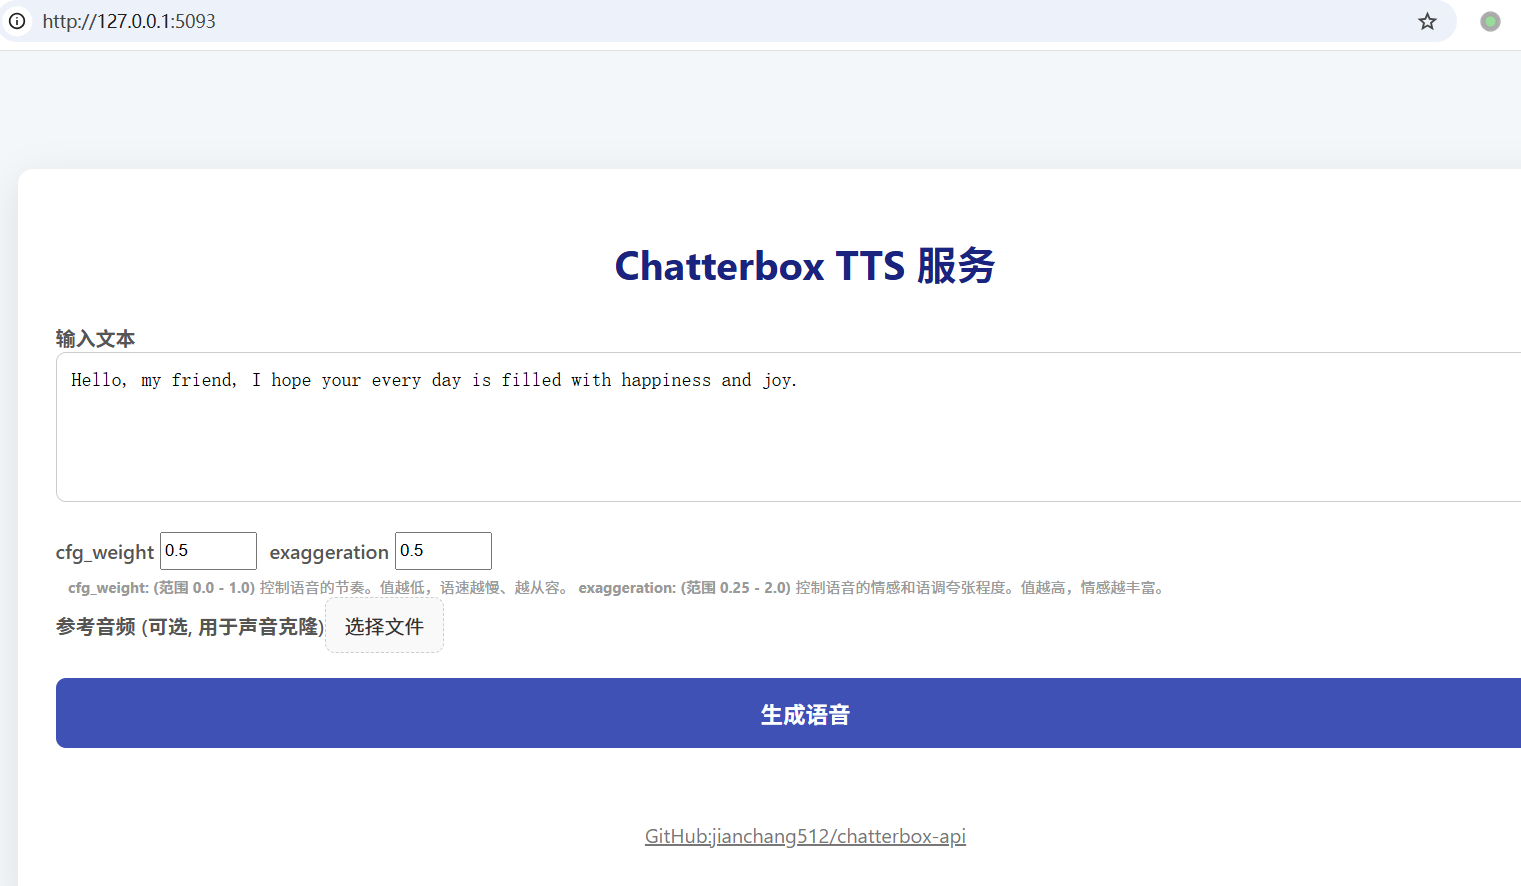
1. Web 界面
服务启动后,在浏览器中打开 http://127.0.0.1:5093 即可访问 Web UI。
- 输入文本: 在文本框中输入您想要转换的文字。
- 调整参数:
cfg_weight: (范围 0.0 - 1.0) 控制语音的节奏。值越低,语速越慢、越从容。对于快节奏的参考音频,可适当降低此值(如 0.3)。exaggeration: (范围 0.25 - 2.0) 控制语音的情感和语调夸张程度。值越高,情感越丰富,语速也可能越快。
- 声音克隆: 点击 "选择文件" 上传一段参考音频(如 .mp3, .wav)。如果提供了参考音频,服务将使用克隆接口。
- 生成语音: 点击 "生成语音" 按钮,稍等片刻即可在线试听和下载生成的 MP3 文件。
2. API 调用
接口 1: OpenAI 兼容接口 (/v1/audio/speech)
此接口无需参考音频,可使用 OpenAI SDK 直接调用。
Python 示例 (openai SDK):
from openai import OpenAI
import os

# 将客户端指向我们的本地服务
client = OpenAI(
    base_url="http://127.0.0.1:5093/v1",
    api_key="not-needed"  # API密钥不是必需的,但SDK要求提供
)

response = client.audio.speech.create(
    model="chatterbox-tts",   # 此参数会被忽略
    voice="en",              #
    speed=0.5,               # 对应 cfg_weight 参数
    input="Hello, this is a test from the OpenAI compatible API.",
    instructions="0.5"     # (可选) 对应 exaggeration 参数, 注意需要是字符串
    response_format="mp3"    # 可选 'mp3' 或 'wav'
)

# 将音频流保存到文件
response.stream_to_file("output_api1.mp3")
print("音频已保存到 output_api1.mp3")接口 2: 声音克隆接口 (/v2/audio/speech_with_prompt)
此接口需要通过 multipart/form-data 格式同时上传文本和参考音频文件。
Python 示例 (requests 库):
import requests

API_URL = "http://127.0.0.1:5093/v2/audio/speech_with_prompt"
REFERENCE_AUDIO = "path/to/your/reference.mp3"  # 替换为您的参考音频路径

form_data = {
    'input': 'This voice should sound like the reference audio.',
    'cfg_weight': '0.5',
    'exaggeration': '0.5',
    'response_format': 'mp3'  # 可选 'mp3' 或 'wav'
}

with open(REFERENCE_AUDIO, 'rb') as audio_file:
    files = {'audio_prompt': audio_file}
    response = requests.post(API_URL, data=form_data, files=files)

if response.ok:
    with open("output_api2.mp3", "wb") as f:
        f.write(response.content)
    print("克隆音频已保存到 output_api2.mp3")
else:
    print("请求失败:", response.text)