Miniconda is a lightweight version of Anaconda that helps you quickly install Python and various packages. It's more suitable for beginners to run AI programs than the full Anaconda distribution.
This tutorial will guide you step-by-step on how to install Miniconda on Windows 10, using the official download link, configure a Python 3.10 environment, and install some commonly used modules. Don't worry, even if you're completely new to this, you can easily handle it!
Step 1: Download and Install Miniconda
Download Miniconda
Open your browser and enter this address, then press Enter: https://www.anaconda.com/download/success#miniconda
Scroll down to the "Miniconda" section and click the download link for Windows, or use this direct link: https://repo.anaconda.com/miniconda/Miniconda3-latest-Windows-x86_64.exe
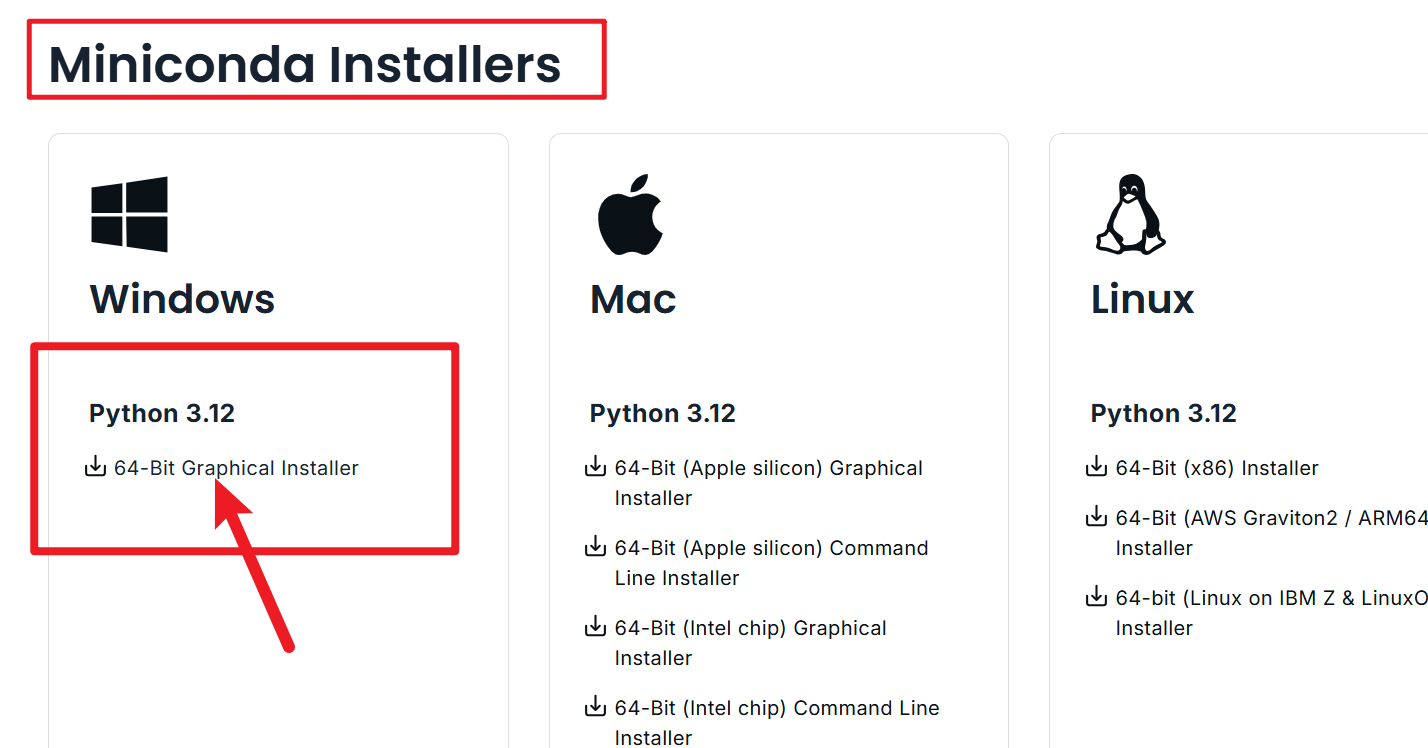
The file will be saved to your "Downloads" folder (e.g.,
C:\Users\YourUsername\Downloads), with a name likeMiniconda3-latest-Windows-x86_64.exe.
Install Miniconda
Double-click the downloaded file to open the installation window.
Click "Next" and agree to the license agreement (click "I Agree").
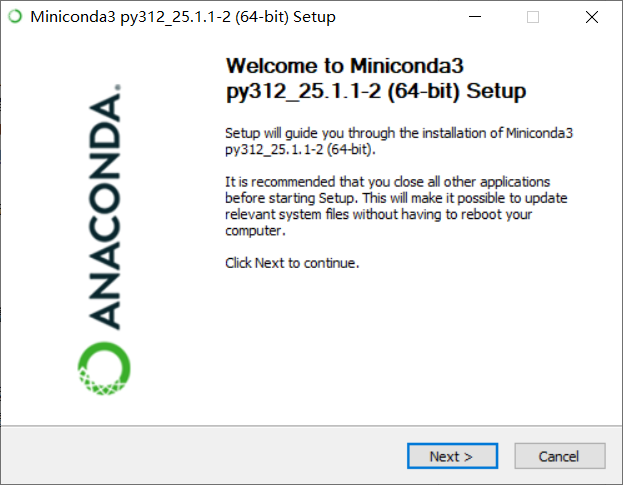
Important: On the "Advanced Options" page, check Add Miniconda3 to my PATH environment variable. This allows you to use the
condacommand directly. Otherwise, you might encounter the errorconda is not recognized as an internal or external command, operable program or batch file.
Note: Some computers may warn that adding to PATH is not recommended. Ignore this and check the box. This is a common pitfall for beginners, as the commands won't work later if you don't check it.
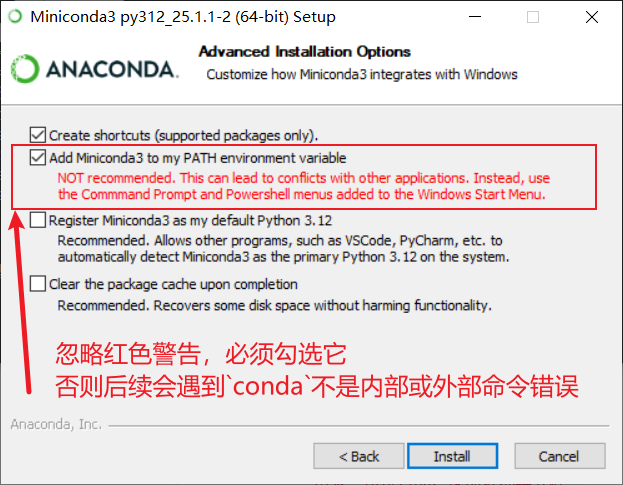
- Click "Install" and wait for a few minutes. Once finished, click "Finish".
Step 2: Verify Installation and Create a Python 3.10 Virtual Environment
Open the Command Prompt (CMD)
- Press the Windows key + R on your keyboard to open the "Run" window.
- Type
cmdand press Enter to open the black command-line window.
Verify that Miniconda is installed correctly
- In the command prompt, type:
conda --versionPress Enter. If you see something likeconda 25.1.1, the installation was successful.
- In the command prompt, type:

If you get a "not recognized" error, it means the environment variable wasn't added. Reinstall and check Add Miniconda3 to my PATH environment variable.  3. Create a Python 3.10 virtual environment
- In the command prompt, type:
conda create -n myai python=3.10 myaiis the name of the environment and can be anything you like (e.g.,ai_env).
- After pressing Enter, the system will download Python 3.10 and some basic packages. During the process, it will ask you "Y/N". Type
yand press Enter to continue the installation.

- Activate the virtual environment
- Type:
conda activate myaiPress Enter. If(myai)appears at the beginning of the command line, you have successfully entered the environment.
- Type:

- Common virtual environment commands
- Exit the environment: Type
conda deactivateand press Enter. The(myai)will disappear when you exit. - View all environments: Type
conda env listto see a list of the environments you've created. - Delete an environment (if you don't need it): Type
conda env remove -n myaito delete it.
- Exit the environment: Type
Step 3: Install Modules using pip and requirements.txt
Make sure you're in the virtual environment
- Type
conda activate myaiand confirm that the command line shows(myai).
- Type
Install a common module as a test
- For example, install
numpy(a mathematical computing tool used by many AI software packages):pip install numpyPress Enter. After downloading and installing, you can check the version usingpython -c "import numpy; print(numpy.__version__)".
- For example, install
Install from requirements.txt
- If your AI software provides a
requirements.txtfile (listing the required packages), copy it to a folder (e.g., a new "AIProject" folder on your desktop). - Navigate to the folder, then delete the contents of the folder's address bar, type
cmd, and press Enter to open a terminal window:
- If your AI software provides a
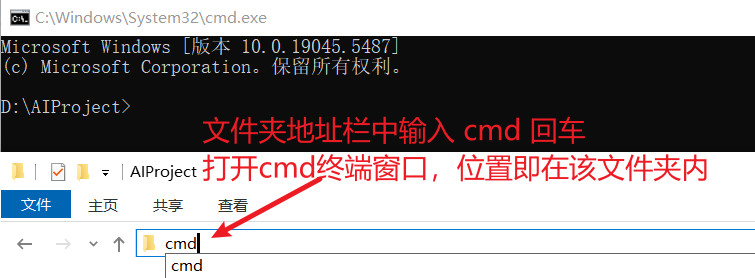
- Then type:
pip install -r requirements.txtPress Enter, and it will automatically install all the packages listed in the file.
Step 4: Common pip Commands and Troubleshooting
Common pip commands
- Check pip version:
pip --versionto see if it's the latest. - Update pip: If the version is old, type
pip install --upgrade pipto update it. - List installed packages:
pip listto see what you've installed. - Uninstall a package: For example,
pip uninstall numpyto remove it if you don't need it.
- Check pip version:
Common errors and solutions
Network errors (slow downloads or failures):
- This could be a network issue. Try again a few times, or use a domestic mirror to speed up the download:
pip install -r requirements.txt -i https://pypi.tuna.tsinghua.edu.cn/simple
- This could be a network issue. Try again a few times, or use a domestic mirror to speed up the download:
Permission errors (Access Denied):
- Run CMD as an administrator: Right-click the "Start" menu, select "Command Prompt (Admin)", and try the command again.
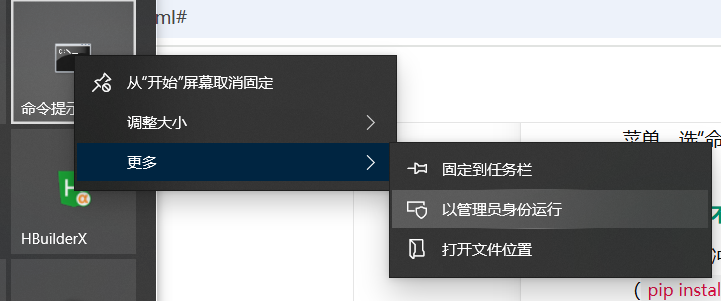
- Run CMD as an administrator: Right-click the "Start" menu, select "Command Prompt (Admin)", and try the command again.
Dependency conflicts (incompatible versions):
- If you get a conflict error, try updating pip (
pip install --upgrade pip) and then reinstalling. If that doesn't work, ask the software author for the recommended versions.
- If you get a conflict error, try updating pip (
Invalid command:
- If
pipisn't working, trypython -m ensurepipandpython -m pip install --upgrade pipto fix it.
- If
Now Miniconda is installed, the Python 3.10 environment is configured, and you can install various required packages. If your AI software has running instructions (e.g., python run.py), enter the corresponding command in the virtual environment (with (myai) showing).
