Parakeet-API: High-Performance Local Speech Transcription Service
Parakeet-API is a local speech transcription service based on the NVIDIA Parakeet-tdt-0.6b model. It offers an OpenAI API-compatible interface and a clean web user interface, enabling you to effortlessly and rapidly transcribe any audio or video file into accurate SRT subtitles, with support for pyVideoTrans v3.72+.
Project open-source repository: https://github.com/jianchang512/parakeet-api
✨ Parakeet-API Core Advantages
- 🚀 Ultimate Speed and Performance: The Parakeet model is highly optimized, delivering exceptionally fast transcription speeds, especially on systems with NVIDIA GPUs, making it ideal for processing large volumes or long-duration media files.
- 🎯 Precise Timestamps: Leveraging advanced Transducer (TDT) technology, it generates SRT subtitles with highly accurate timestamps that align perfectly with the audio stream, perfect for video subtitle creation.
- 💰 Completely Free, Unlimited Usage: Run it on your own hardware with no API call fees or usage limits.
- 🌐 Flexible Access Methods: Provides an intuitive web interface and standardized API endpoints for easy integration into existing workflows like
pyVideoTrans.
🛠️ Installation and Configuration Guide
This project supports Windows, macOS, and Linux. Follow the steps below for installation and setup.
Step 0: Set Up Python 3.10 Environment
If you don't have Python 3 installed, follow this tutorial: https://pvt9.com/_posts/pythoninstall
Step 1: Prepare FFmpeg
This project uses ffmpeg for audio and video format preprocessing.
Windows (Recommended):
- Download from FFmpeg GitHub Releases, extract, and locate
ffmpeg.exe. - Place the downloaded
ffmpeg.exefile directly in the project root directory (same level asapp.py). The program will automatically detect and use it without needing to set environment variables.
- Download from FFmpeg GitHub Releases, extract, and locate
macOS (Using Homebrew):
bashbrew install ffmpegLinux (Debian/Ubuntu):
bashsudo apt update && sudo apt install ffmpeg
Step 2: Create Python Virtual Environment and Install Dependencies
Download or clone this project's code to your local machine (recommended to place in a non-system drive folder with English or numeric names).
Open a terminal or command-line tool and navigate to the project root directory (on Windows, simply type
cmdin the folder address bar and press Enter).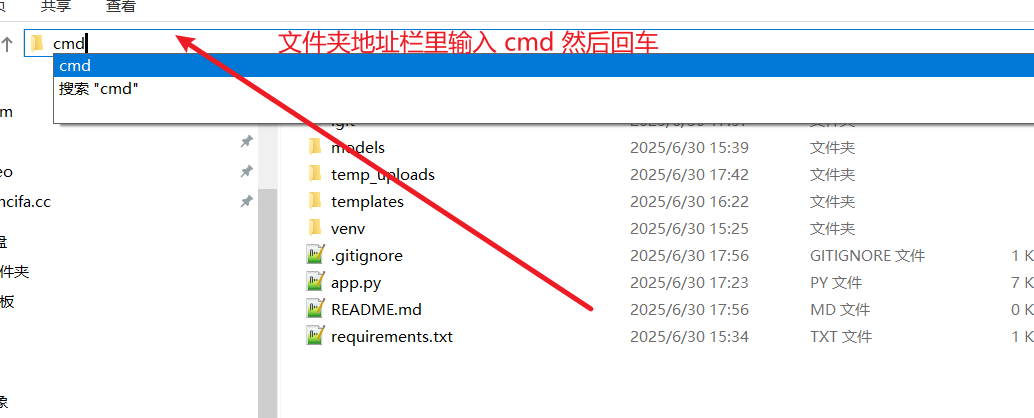
Create a virtual environment:
python -m venv venvActivate the virtual environment:
- Windows (CMD/PowerShell):
.\venv\Scripts\activate - macOS / Linux (Bash/Zsh):
source venv/bin/activate
- Windows (CMD/PowerShell):
Install dependencies:
If you do NOT have an NVIDIA GPU (CPU only):
bashpip install -r requirements.txtIf you have an NVIDIA GPU (for GPU acceleration): a. Ensure you have the latest NVIDIA drivers and corresponding CUDA Toolkit installed. b. Uninstall any existing older PyTorch versions:
pip uninstall -y torchc. Install PyTorch matching your CUDA version (example for CUDA 12.6):bashpip install torch --index-url https://download.pytorch.org/whl/cu126
Step 3: Start the Service
In the terminal with the virtual environment activated, run the following command:
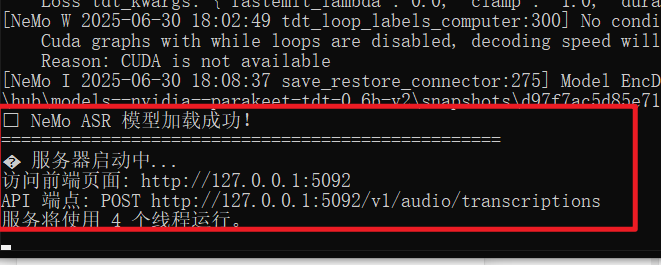
python app.pyYou will see service startup messages. On the first run, the model (approx. 1.2GB) will be downloaded—please wait patiently. 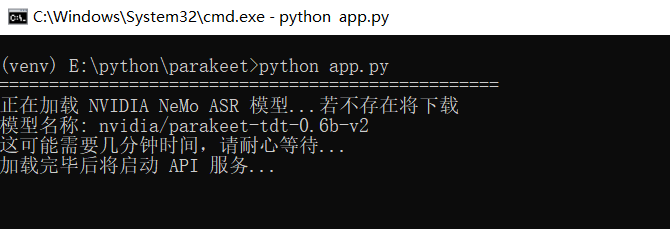
If you see various log messages, don't worry. 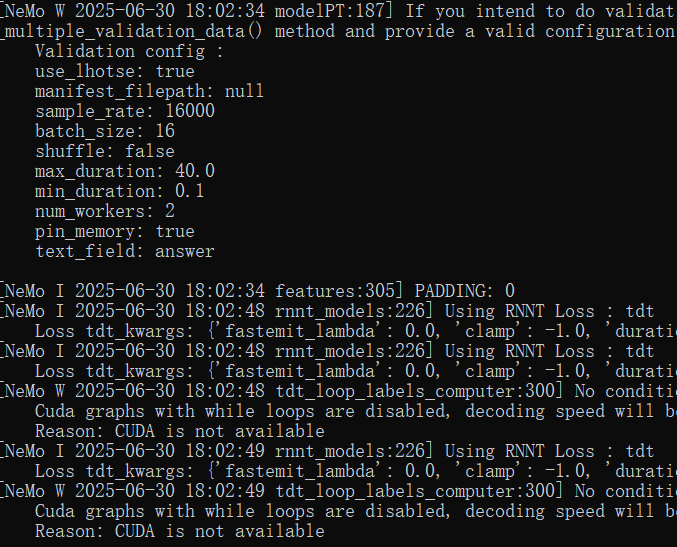
Successful Startup Interface
🚀 Usage Methods
Method 1: Using the Web Interface
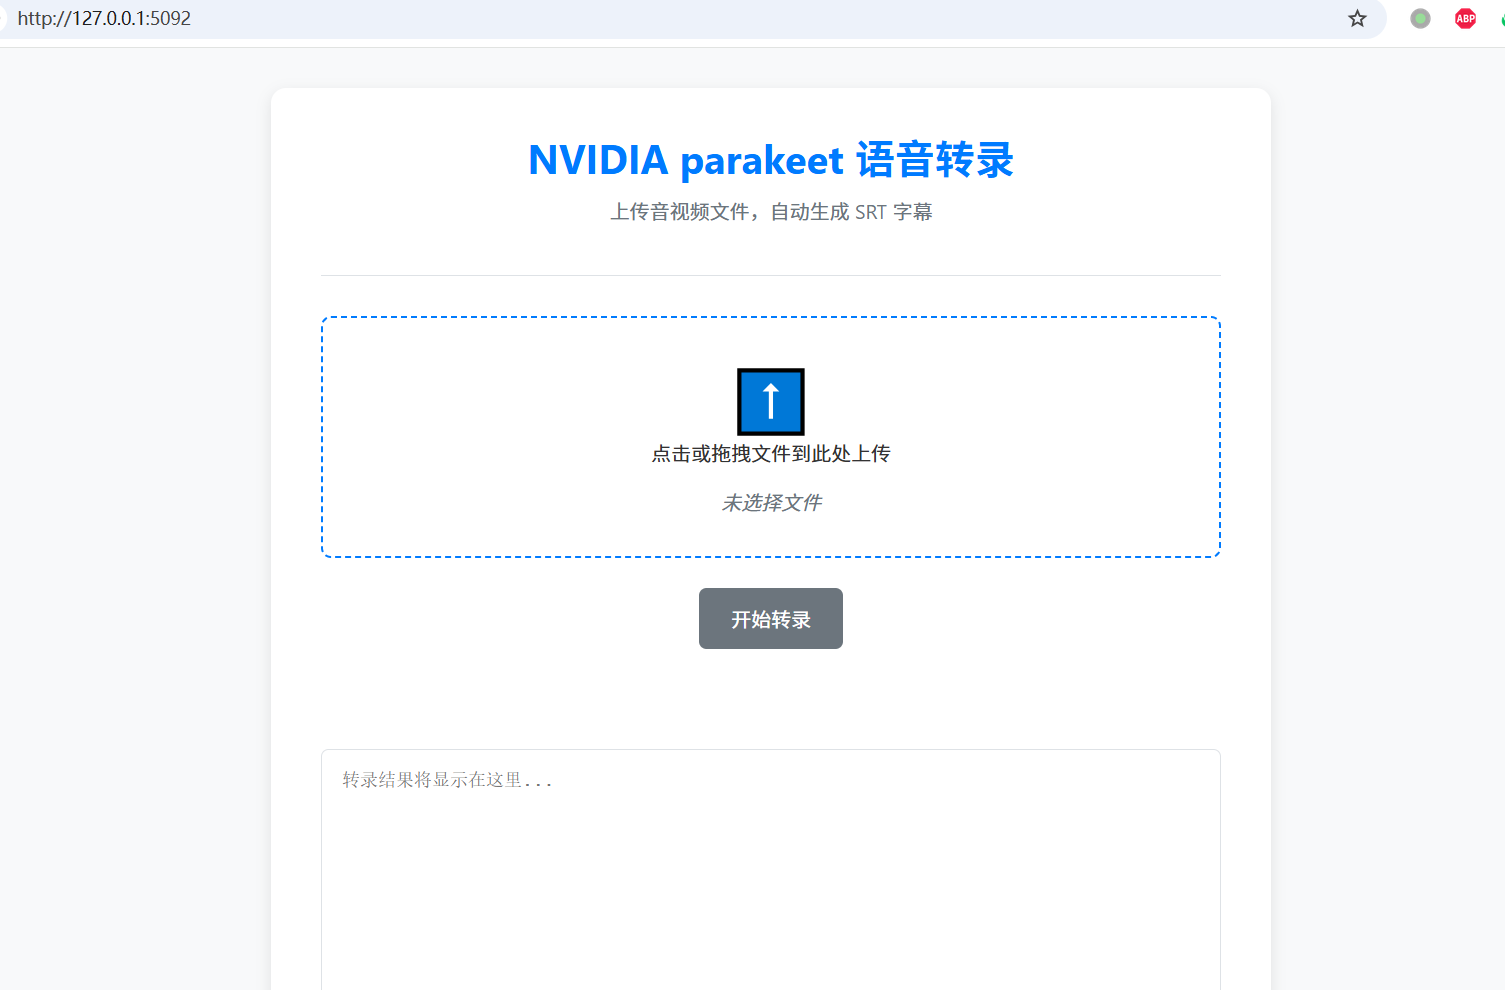
- Open your browser and go to: http://127.0.0.1:5092
- Drag and drop or click to upload your audio or video file.
- Click "Start Transcription", wait for processing to complete, and then view and download the SRT subtitle below.
Method 2: API Call (Python Example)
Use the openai library to easily interact with this service.
from openai import OpenAI

client = OpenAI(
    base_url="http://127.0.0.1:5092/v1",
    api_key="any-key",
)

with open("your_audio.mp3", "rb") as audio_file:
    srt_result = client.audio.transcriptions.create(
        model="parakeet",
        file=audio_file,
        response_format="srt"
    )
print(srt_result)Method 3: Integration with pyVideoTrans (Recommended)
Parakeet-API seamlessly integrates with the video translation tool pyVideoTrans (version 3.72 and above).
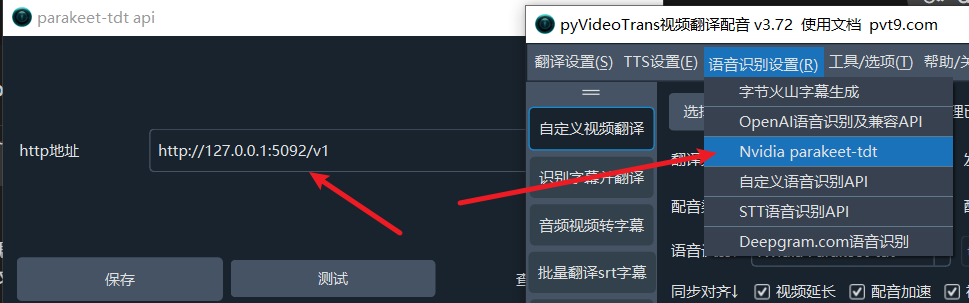
- Ensure your
parakeet-apiservice is running locally. - Open the
pyVideoTranssoftware. - In the menu bar, select Speech Recognition (R) -> Nvidia parakeet-tdt.
- In the configuration window that appears, set the "HTTP Address" to:
http://127.0.0.1:5092/v1 - Click "Save", and you're ready to use it.